Advanced security settings
Now that you’ve learned about the different login methods for your system, let’s go over a couple more advanced security options which you can use.
IP Restrictions
By setting up IP restrictions you can add an extra layer of security to your system. You can select exactly which IP addresses are allowed to log in to your system, and choose which user roles these restrictions will apply to. For example, you can set that your sales reps are only able to access your system when they’re connected to your office’s IP address. To set this up, first go to the IP Restrictions option and then click the Add button.

This will open a form where you can set the details for your new IP restriction. Set the Name field as a name which will help you identify the purpose or placement of this restriction, such as “Sales Office”. Next set the IP Address and Role fields, which are explained below.
IP Address
In the IP Address field you can set the IP address which you’d like to allow access from. For example, if you put the IP address “111.111.111.111”, then only users who are connected to this IP address will be able to connect to the system. You can add more than one IP address in this field to provide access from multiple IP addresses. Simply separate each IP address with a comma, such as setting this field’s value to “111.111.111.111, 222.222.222.222, 333.333.333.333”. Now users can sign in from any of the listed IP addresses.
Role
This is a lookup field to the roles in your system. By setting a role in this field, your IP restriction will only apply to the role you select. Continuing the above example, by selecting the Sales Rep role here, only users who are assigned the sales rep role will have to sign in from the set IP address. All other users will not need to meet the IP requirements, assuming they do not have their own IP restrictions.
After setting up your IP restriction, be sure to click Save to save and activate it. Its page will open, where you can use the form and stream like in any other record. By going back, you’ll see your new restriction added to the list in the IP Restrictions view.
Login Log
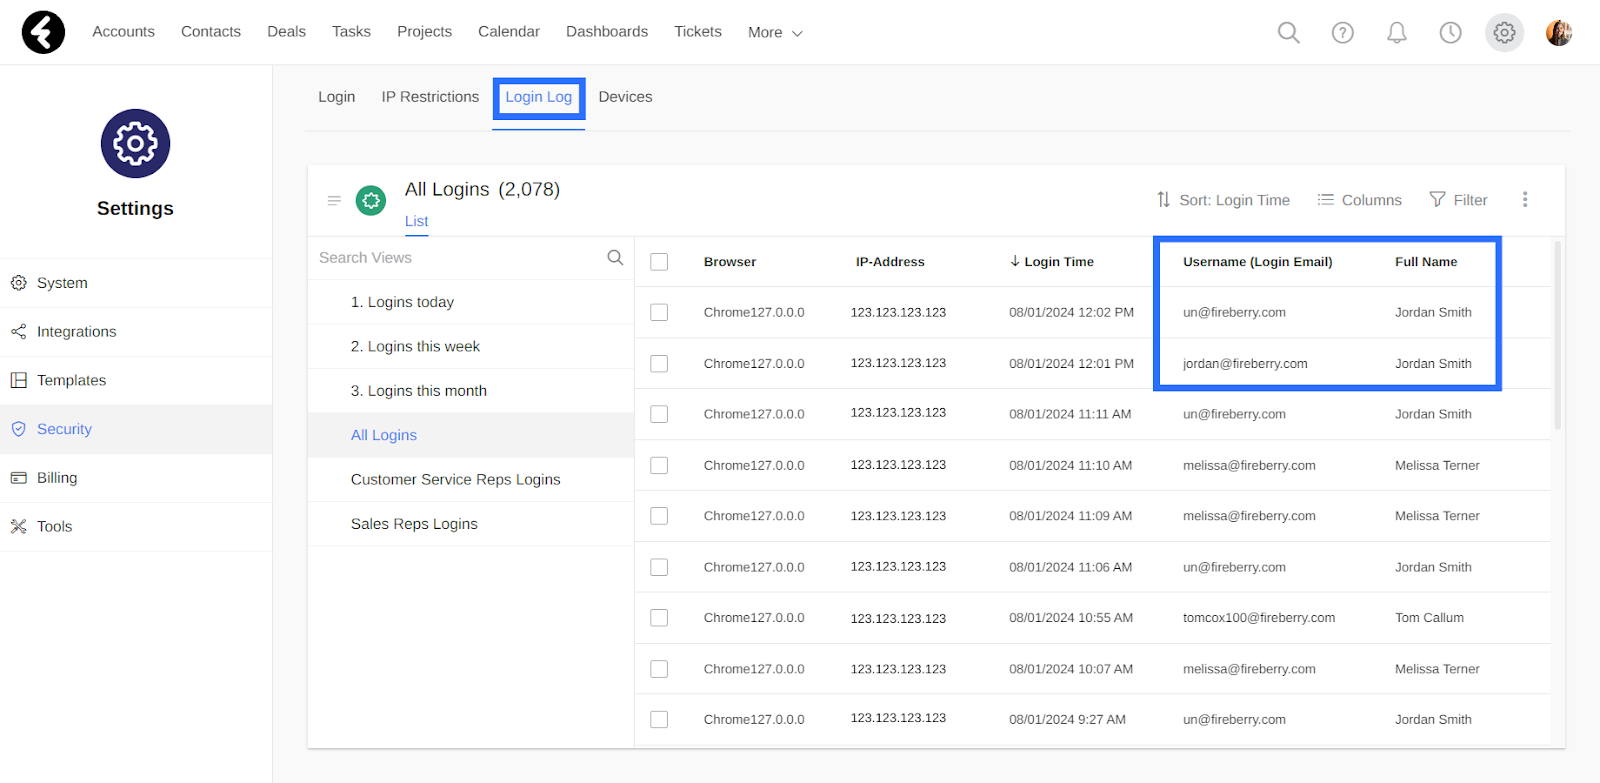
Open the Login Log section to see a list view of all the logins to your system. Each row here represents a single time that a specific user logged into the system. You can use the columns to see the name and username of the user, the time they logged in, the browser they logged in from, and the IP address they were using at the time.
The Username (Login Email) field will contain the username of the user at the time they logged into the system, so that if a user has changed their username you may see multiple entries with the same user’s name but different usernames.
Devices
Device verification will automatically be enabled for your account, and adds an additional layer of security. Anytime a system user logs into the system from a device which has not been verified, they’ll need to verify the new device using a code which is emailed to them. This email will be sent to their primary email address and not the login email address. Once a device is verified for a user, it will not need to be verified again.
You can find a log of all your verified devices by opening your profile, clicking the Account Security tab, and then selecting the devices tab. Here you can see all the devices which have been successfully verified, which will have their status set to Success. If you’d like to unverify a device, simply delete its row in this list. You’ll also see any failed attempts to verify a device; these rows will have the status Challenged. In this way you can manage the individual devices which belong to your specific system user.

Additionally, you can choose to delete all the verified devices for all your system users. Simply click the settings gear, go to the Security tab, and then open the devices section. By clicking the Delete All Devices button, you’ll delete the verification for all the devices of all the users in your system. This is useful if you’re concerned about unauthorized devices.

Two-factor authentication (2FA)
Two-factor authentication (2FA) is a security process that enhances the protection of your user accounts by requiring two forms of verification before any user can access your system. Fireberry’s 2FA feature can be activated by using the safeguard plan, which you can learn about here. If you like to add safeguard to your system, click here. By activating 2FA for your system, you'll add an extra layer of security to ensure that your data always stays in the right hands.
Once you’ve set up 2FA for your system, all your users will need to complete the two step verification process in order to login. To start, you’ll need to enter your email and password credentials in the login page, which you can find here. After successfully logging in, you'll be sent an email with your verification code as is pictured below. This email will be sent to your primary email address, and not your login email address.

At the same time, your login page will open the 2-step verification page. Here you can paste the verification code from your email. By inputting this code you'll successfully log in to your system.

If you haven't received an email, first click the resend button. If you still don’t receive an email you may not be looking at the correct email inbox. Check that the primary email address in your profile is up to date.
Audit Log
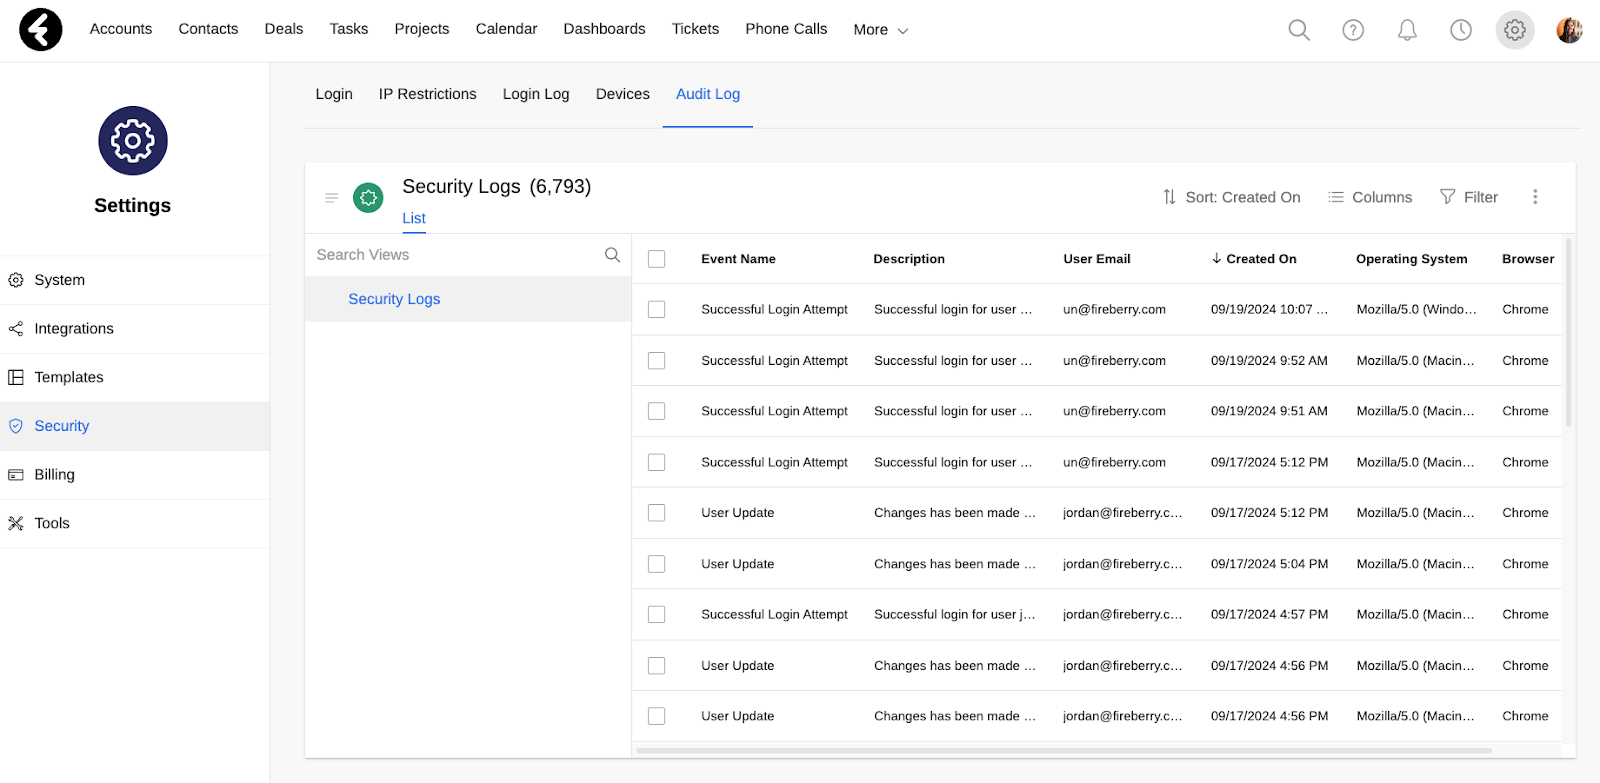
The audit log is another feature which you can enable with Fireberry’s safeguard package. By using the audit log, you’ll be able to track many different security events in your system, such as login attempts, changes to system users, imports, exports, bulk edits, and much more. Each row in the audit log will show one security occurrence, including all its details. To get to the audit log, simply go to your settings, open the Security tab, and click the Audit Log section. In this way you can easily keep track of many different security events which happen in your organization.
You can choose to add extra layers of security to your system using the advanced security settings, such as IP restrictions, device verifications, and more.