Editing your top bar menu
In previous lessons, you’ve learned about the top bar menu. As a quick reminder, this menu lets you access all the different system objects, and is the best way to navigate through the system. Below you’ll learn how to customize the objects in this menu so you can quickly access whichever objects you most frequently use.
Editing the menu
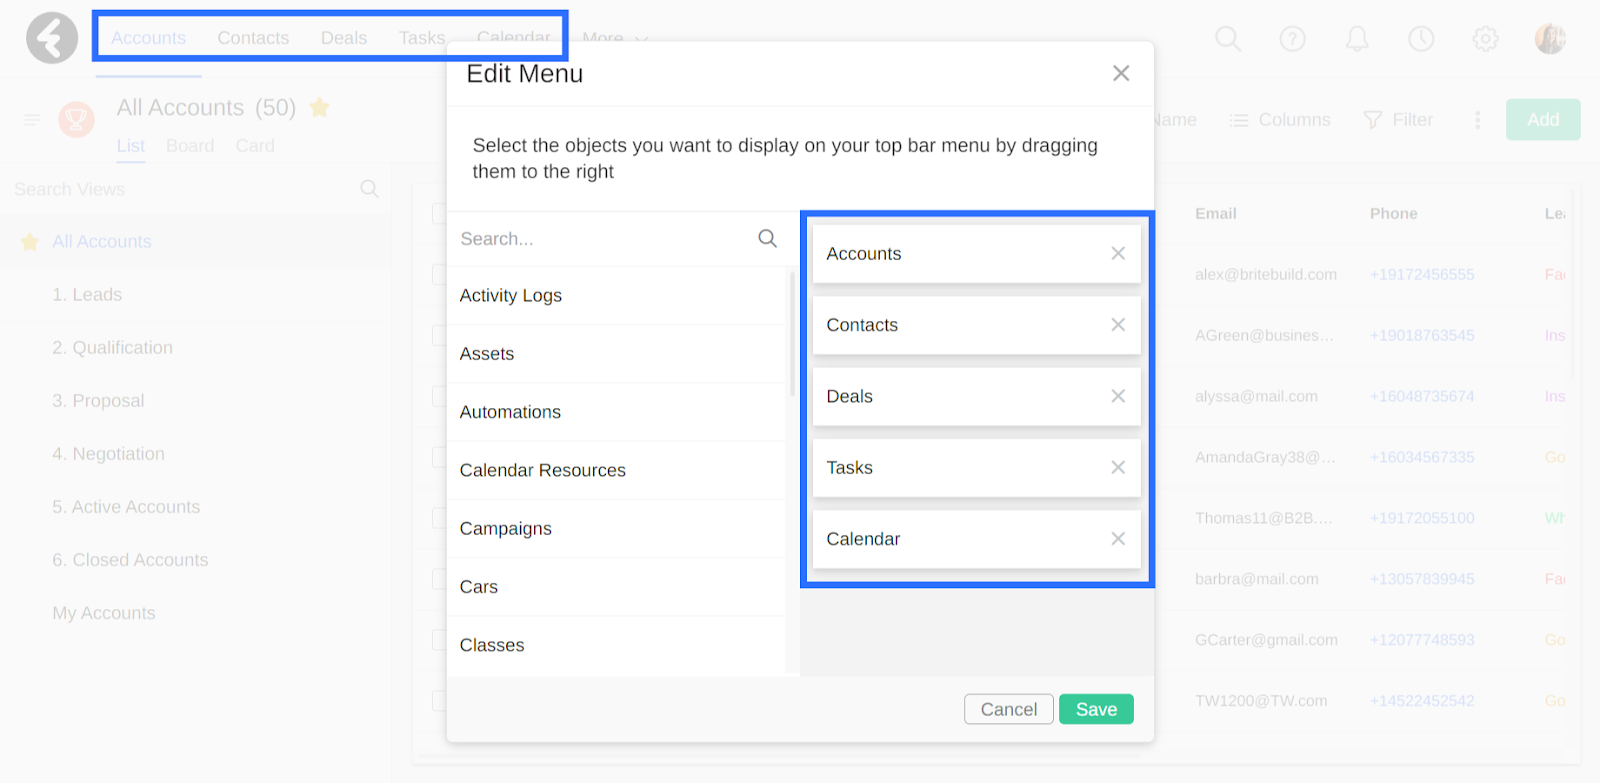
To get started, first open your menu settings. To do so click More from the top bar menu, and then select the Edit Menu option at the bottom of the list. Here you can choose which objects will be displayed, and in what order.

On the right you’ll find a list of all the objects which are currently displayed in your top bar menu. Your menu is ordered from left to right starting with the first object in the list and continuing on in descending order.

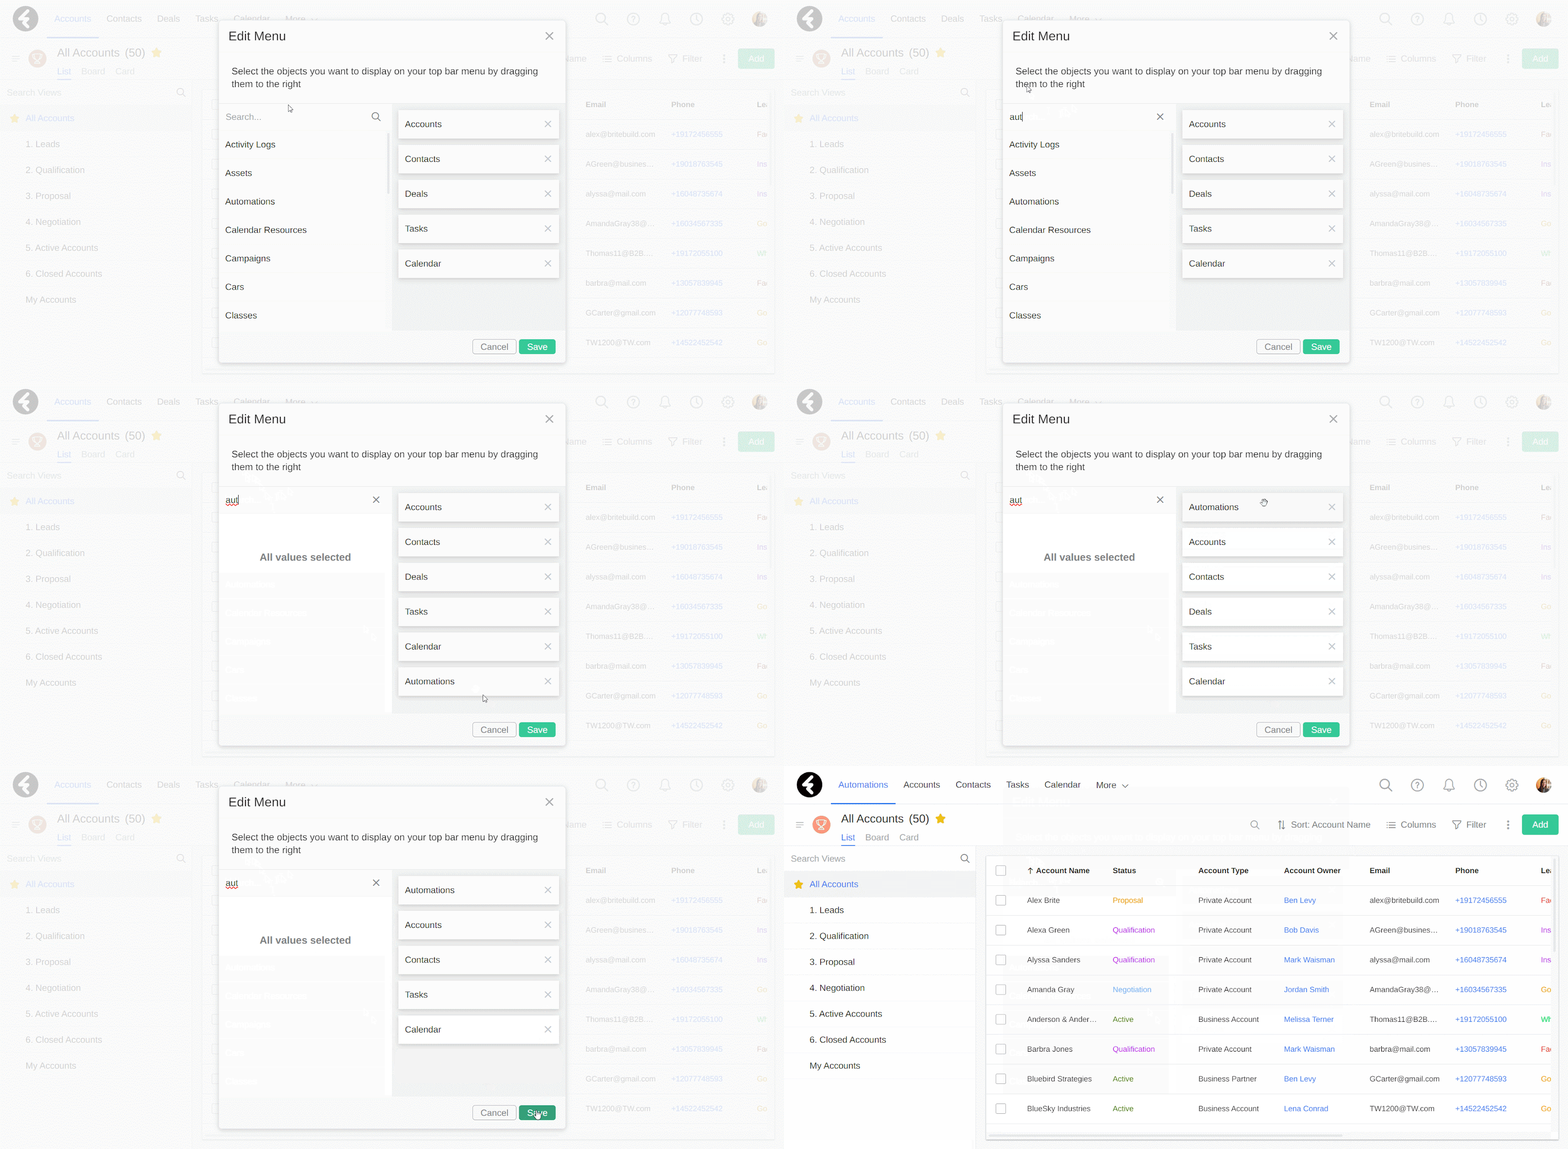
On the left you’ll find a list of all the objects in your system. By clicking on an object, you’ll add it to the menu list on the right. If you can’t find the object you’re looking for, simply search for it. After adding an object, it’ll appear at the bottom of the object list. You can easily drag and drop the objects in your list to reorder your menu. By using the X on the right of each object, you can remove them from your top bar menu. For example, if you frequently work with automations you can click Automations to add it to your menu and then drag it to the top of your list. If you don’t work with deals, you can remove this option using the X.

Once you’ve made all your changes, be sure to click Save. This will permanently save your newly customized menu. If you instead realize you don’t want to update your menu, simply click Cancel. By personalizing your menu, you’ll be able to easily access the objects you frequently use and create a system which is optimized for your personal use.
Optimize your work by setting up your top bar menu so you can easily access all the objects you frequently use.