Importing data
You can import all different types of data into your system. This is a great way to import your existing data and update any existing records with new information.
Access the import tool
To start the import process, you’ll need to open the import tool. First click on the gear icon on the top right of the page to open the system settings. Then select the Tools tab on the left; this will open up the Import page by default. Here you can click on the green Import button under the Import Data heading.
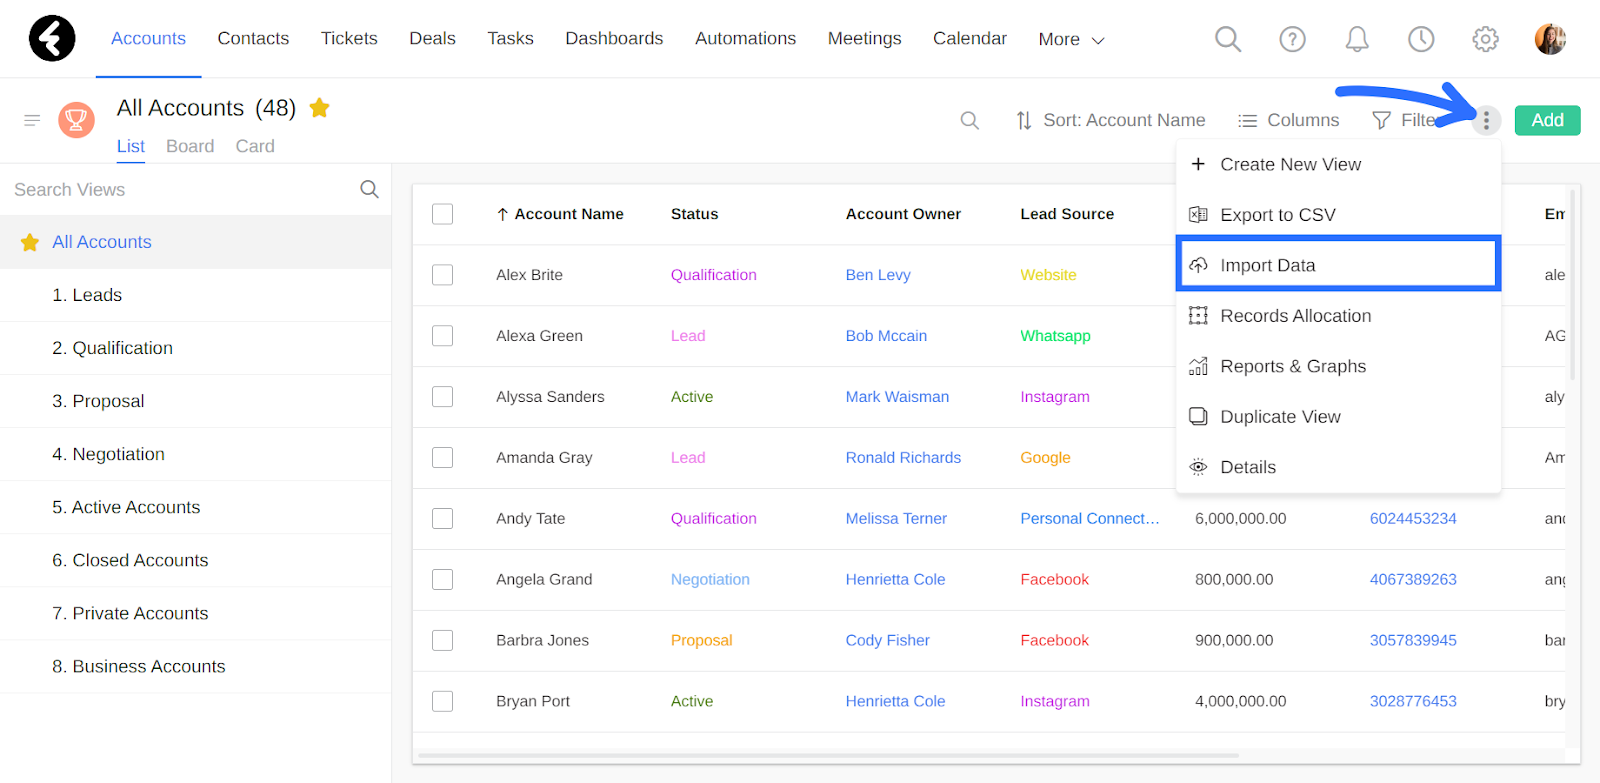
You can also choose to open the import tool directly from the Accounts or Contacts views. To do so, simply click the three dot icon on the top right of the view and then select Import Data. This will bring you to the import tool, where you can click the green Import button to begin.
Upload a file
Once you’ve opened the import tool, the first step is uploading a CSV or Excel file. In the next lesson we’ll go over how to set up your file. Make sure your file is the right type by checking that it ends with .xls, .xlsx, or .csv. You can then click the green Upload File button to open up the documents on your computer. Select the file you’d like to import, and then click Open on the bottom right of the documents window. If your file is not the correct type, you will receive an error and can try again. You’ll only be able to import one file at a time. After uploading your file, the file name will appear in blue in place of the Upload File button. You can then click Next to move on to the next step, or click Cancel to delete the current file and upload a new one.

Select a data type
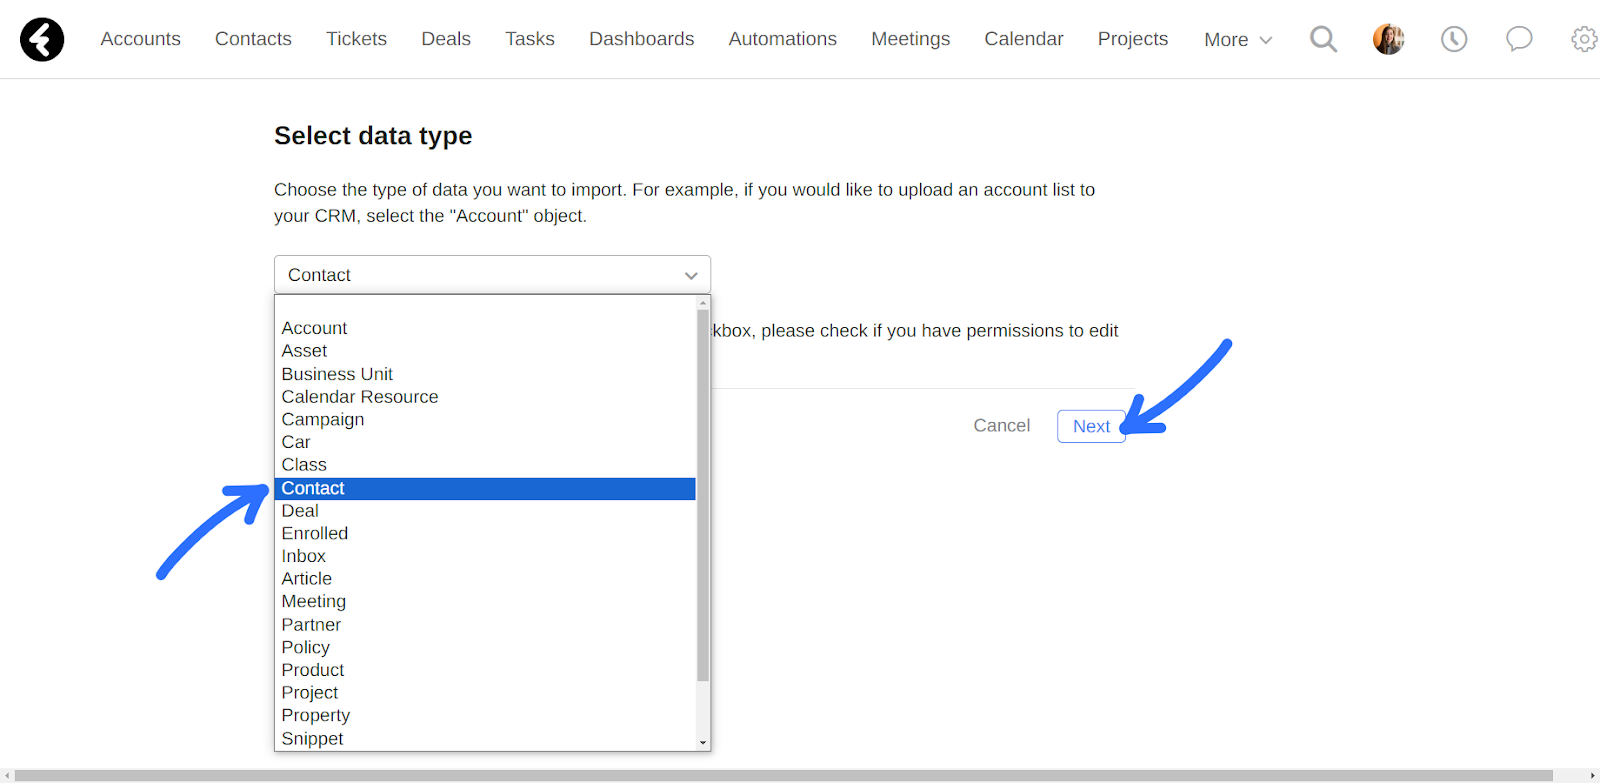
Now that you’ve uploaded a file, you can choose where to upload the data to. You’ll need to select the object which you’d like to add records to or update existing records within. For example, if your file contains new contacts which you’d like to add to the system, select the Contacts object. To choose the relevant object, simply click on the empty box. This will open a searchable dropdown list of editable system objects. You can now click on an object to select it. After selecting an object, you can click the Next button to move on to the next step. To switch the selected object, simply click on it to reopen the dropdown list and select a new object. You can click Cancel at any time to return to the previous step.
Import type
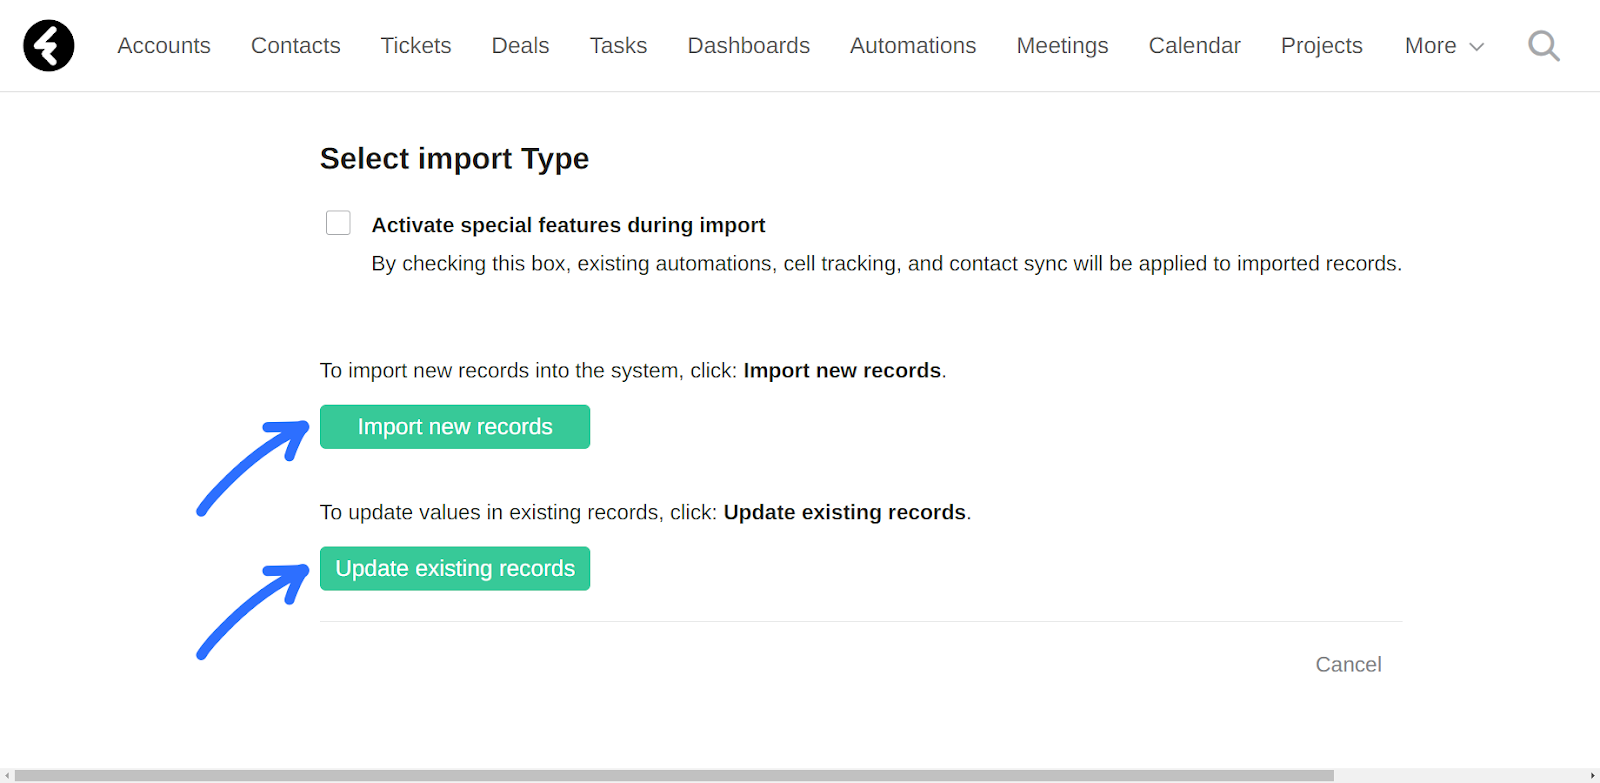
Now that you’ve chosen which object type your new data belongs to, you can select if you’d like to import new records to the selected object or update existing records within the object. The Import new records button adds new records into the system. The Update existing records button will find and then update data within existing records. Click on the relevant green button to move to the next step, or click Cancel on the bottom right at any time to restart the import process.
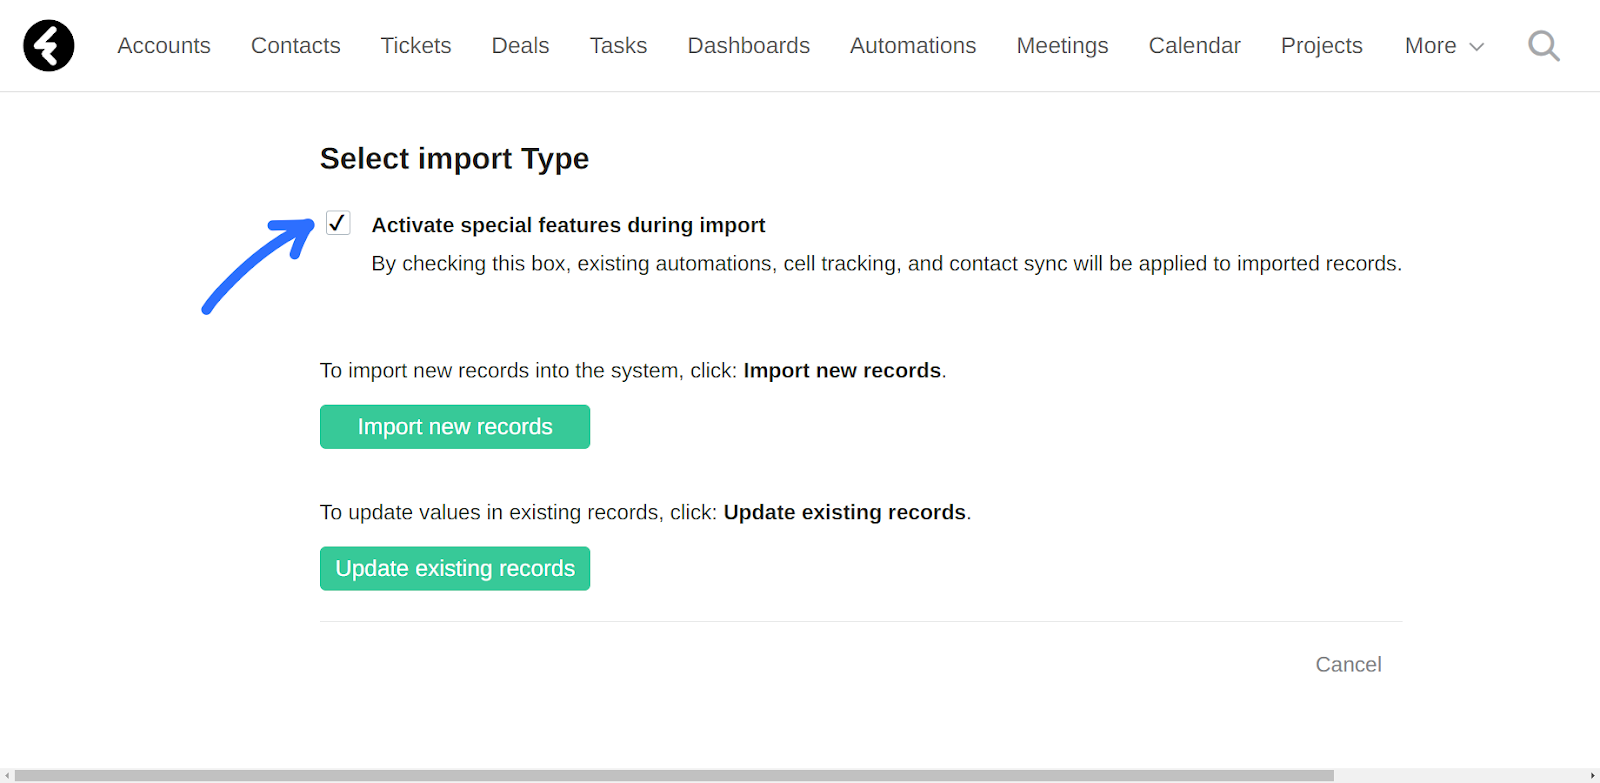
Activate special features
Before selecting an import type, choose if you’d like to check the Activate special feature during import checkbox. Checking this box will activate automations, field tracked changes, and syncing both contacts and meetings with your Google or Office365 account. For example, If you do not select this box and you have a welcome email automation which is sent to all newly created accounts, accounts which are created via this import will not receive the email. If you’re not sure if there are active automations you may activate, or don’t want users to receive notifications based on changes made through your import, you can choose not to activate special features.
Match the fields
Once you’ve chosen whether to import new records or update existing ones, you can set up where each column in your file will be imported to. This is done by matching the columns in your file to the system fields in the selected object. In the next lessons we’ll explain this process in detail, and the differences between importing new data and updating existing data.
Import log
After completing the import process, you can use the import log. This contains a complete list of any time data has been imported into your system. It’s a great way to track when data has been imported, by who, and to where. You can open the import log at any time by clicking the settings gear on the top right of any system page and then selecting the Tools tab from the left sidebar menu. The Import page will open by default, where you’ll find the Import Log section.
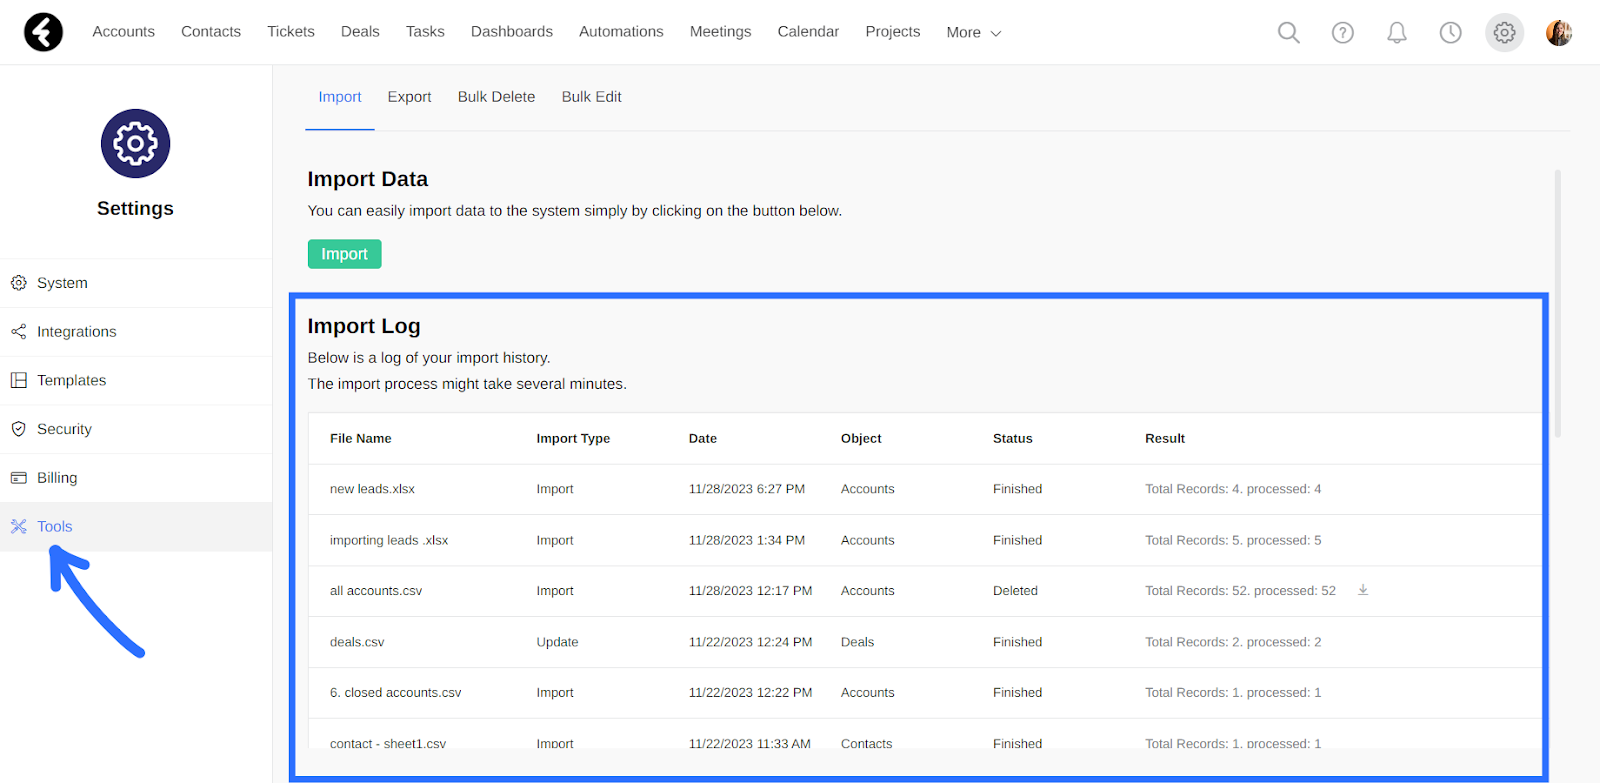
Each row in the import log represents a single time that data was imported, and contains the following details from the column headers:
- File Name: The name of the file which was imported.
- Import Type: This will display Import if the import created new records and Update if existing records were updated.
- Date: The exact date and time when the import process started.
- Object: The object which records were added to or updated in.
- Status: This will display Finished if the import finished successfully, Failed if the import did not complete successfully, Initializing at the start of the import, In progress if the import is still processing, Deleting while a reversion is in process, and Deleted if the import has been fully reverted. We’ll discuss the revert option in the next lesson.
- Result: This will display the total amount of records in the file, followed by the amount of records which have been processed successfully. You can use this to check the progression of your import. If an import has been reverted, a download symbol will be found after this text where you can download a copy of the changes.
Be sure to check out our next two lessons to learn how to set up your file and match your fields when importing and updating records.
Import data into your system easily using an Excel or CSV file. Choose an object to import into, and then either import new records or update existing ones.
Course Lessons
Up next
