Creating a new record
Now that you’ve learned what a record is, you can start adding new ones to your system. To demonstrate, let’s create a new account record. First click the Accounts object from the top bar menu. Within the accounts view, you’ll find the green Add button on the top right. By clicking it, a pop up will open where you can fill in all your new account’s details.
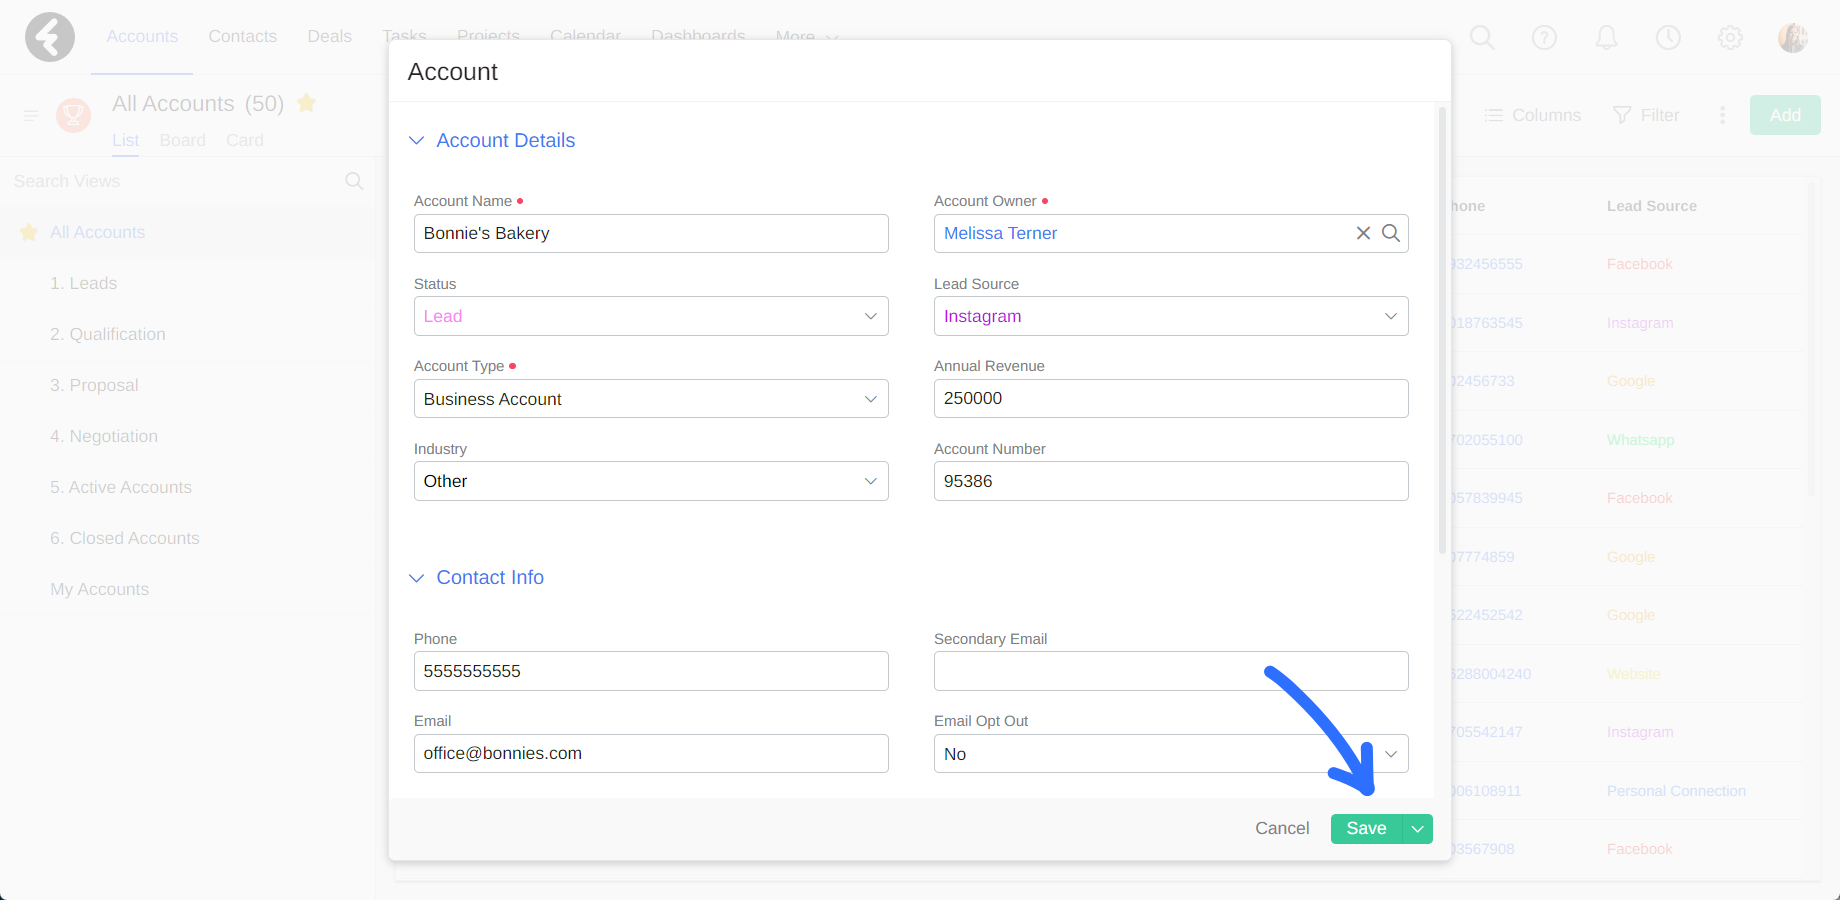
The pop up displays the accounts form, and includes all the different fields which you can set for your new account. The name of each field can be found at the top of the box, and you can set the value for the field in the box. For example, under the Account Name field you can set the name of your account, such as Bonnie’s Bakery. You can then fill in their phone number and email address under the relevant fields. In this way you can continue to fill out all the new account’s details, such as their address, lead source, and more.

Each field has a set type and its own settings. Let’s go over field types and settings to better understand the account fields.
Field types
Every field in the system has a type. For example, the Account Name field is a text field where you can input up to 200 characters. The Annual revenue field is a number field, where you can only input numbers. You can learn about all the different field types here.
Let’s go over two special field types which you’ll find in the new account form.
- Picklist fields: The built in Status field is an example of a picklist field. Picklist fields let you choose one option from a list of options. The down arrow in a field lets you know it's a picklist field. By clicking on it, you’ll open up a dropdown list of options. You can then select one of these options. For example, in the Status field you can select the Lead option for new accounts.
- Lookup fields: The built in Account Owner field is an example of a lookup field. Lookup fields help you relate records to each other. For example, the account owner field helps you relate each account record to one system user record. The magnifying glass next to a field lets you know it’s a lookup field. By clicking on it, you’ll open a list of records. You can then click on one of these records to select it. For example, in the Account Owner field you can select the system user Melissa Terner to relate her record to the current account and set her as the manager.
Field settings
There are a few special field settings and requirements which are important to know about:
- Required Fields: These fields have a red dot next to their name, and are required. You will not be able to save a record’s form without filling in these fields. For example, the Account Name field is required and must be filled in if you’d like to save an account.
- Read Only Fields: These fields are locked, and their values cannot be changed. You can identify them by the lock icon in their box. For example, the Created By and Created On fields are both locked and cannot be changed.

Saving your new record
Once you’ve filled out all the relevant fields in a form, you can click Save on the bottom right to create your new record. By clicking Save, you’ll open your new record’s page. Here you’ll be able to access all the fields you just filled out.
If you’d like to create multiple records in a row, you can click the down arrow next to the Save button and then click Save & New. This will save your new record and open up a blank form where you can add the details for your next record.
Editing your fields
Once you’ve opened your new record’s page, you’ll find its form on the left. The form holds the record’s fields. In an account record’s page, you’ll find the fields discussed earlier, such as the Account Name, Status, and Account Owner fields, as well as many more.
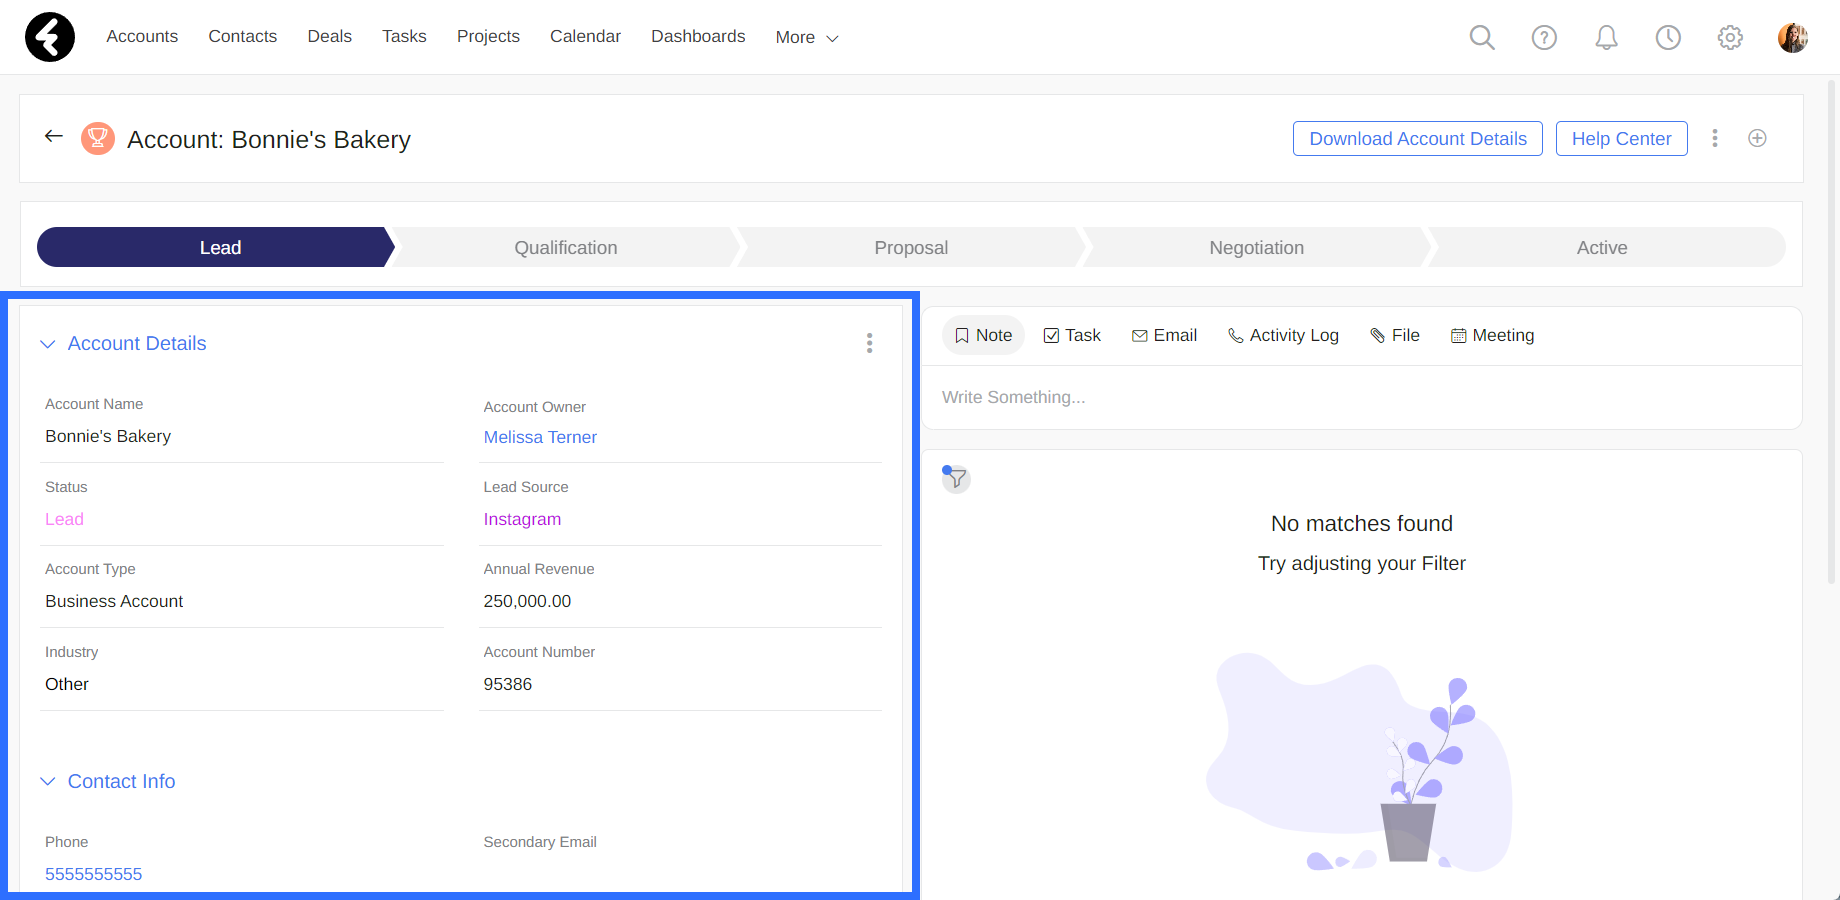
The values you set earlier will be displayed in this form. You can choose to edit these values, or add new values to fields which aren’t filled in yet. For example, you may want to add a value to the Annual Revenue field. To start, hover over the field and then click the pencil icon. This will open the field editor. You can now type in the new value, and then click the checkmark to save your changes.
Clicking the checkmark will save all the fields which are in edit mode, and not just your current field. For example, if both the Phone and Email field are in edit mode, clicking the checkmark next to either field will save both the new values.
Start creating new records for all the data you'd like to add to your system. Fill out the relevant fields and learn about special fields.
Course Lessons
Up next