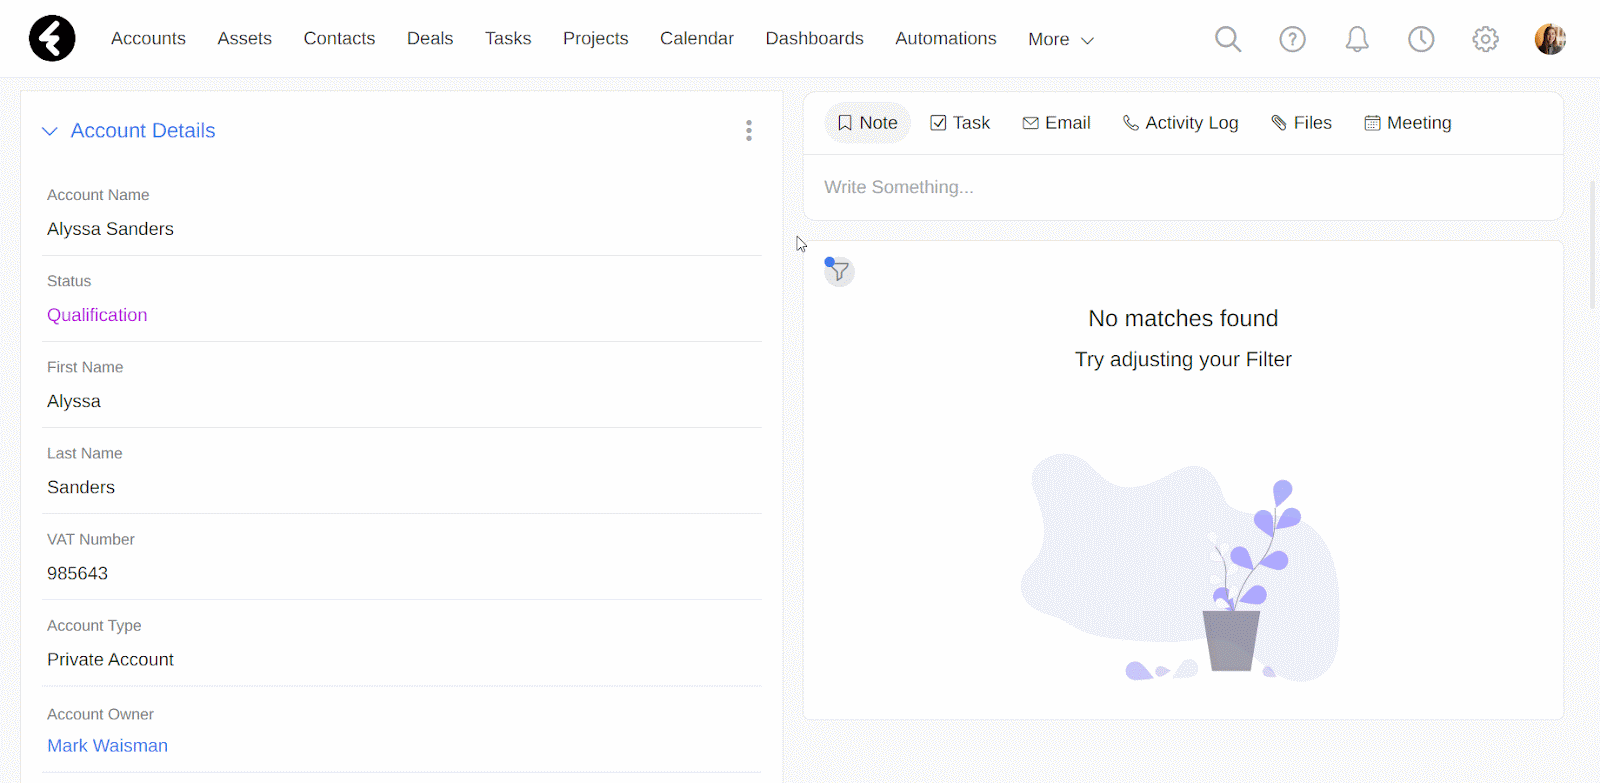
Using the stream
In our previous lessons you may have noticed the stream, which can be found on the right side of most record pages. The stream is used to create and manage each record’s individual activities, which include tasks, notes, meetings, files, and more.

By using the stream, you can keep each record’s data in the relevant place and easily get an overview of the recent communication and activities of any record. You’ll also be able to quickly perform actions related to the record, such as scheduling a meeting, writing down notes, documenting a phone call, and much more. Below you’ll learn about all the different activities you can work with using the stream.
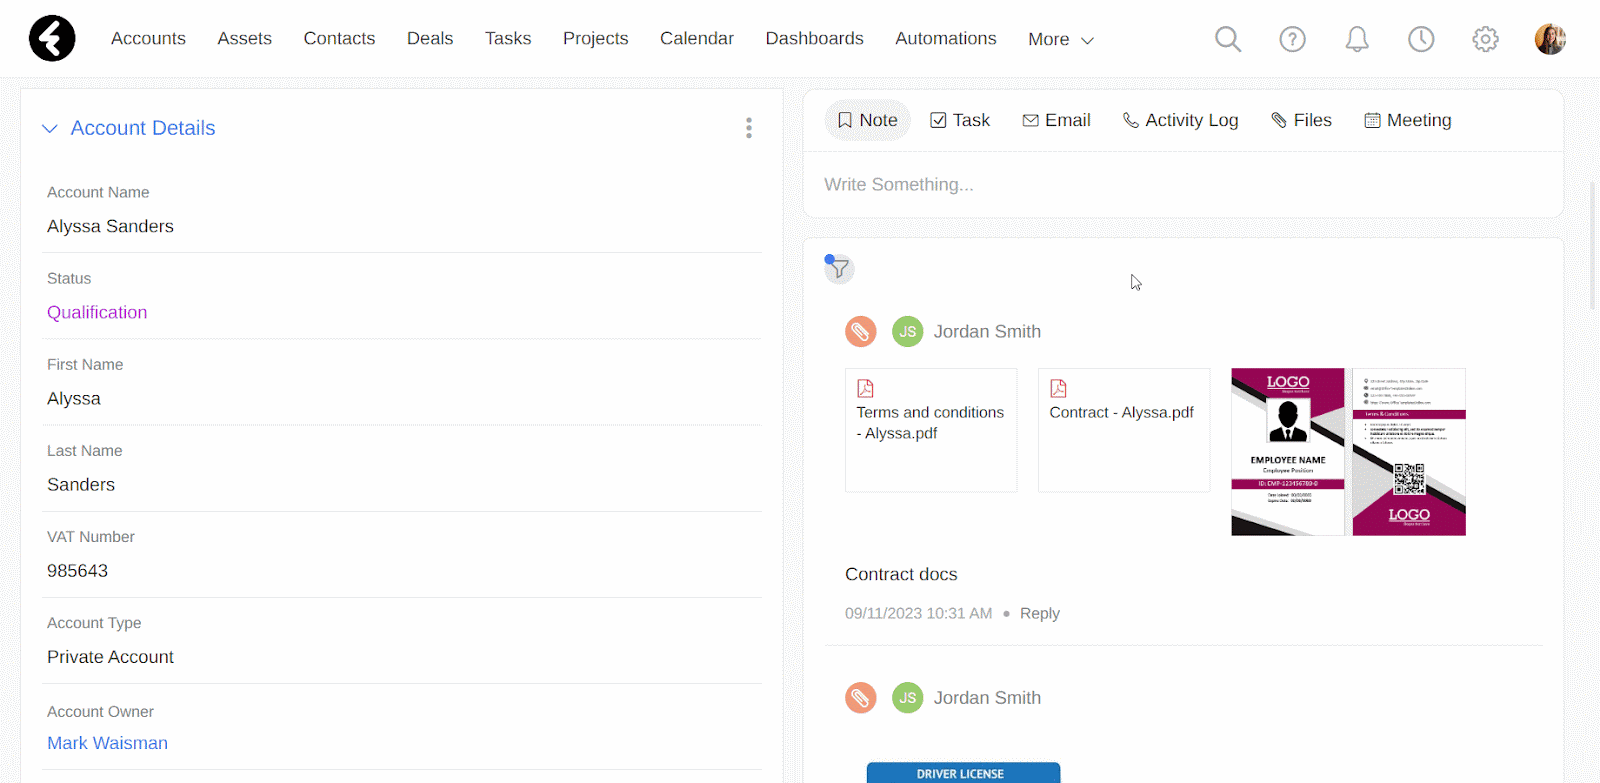
Notes
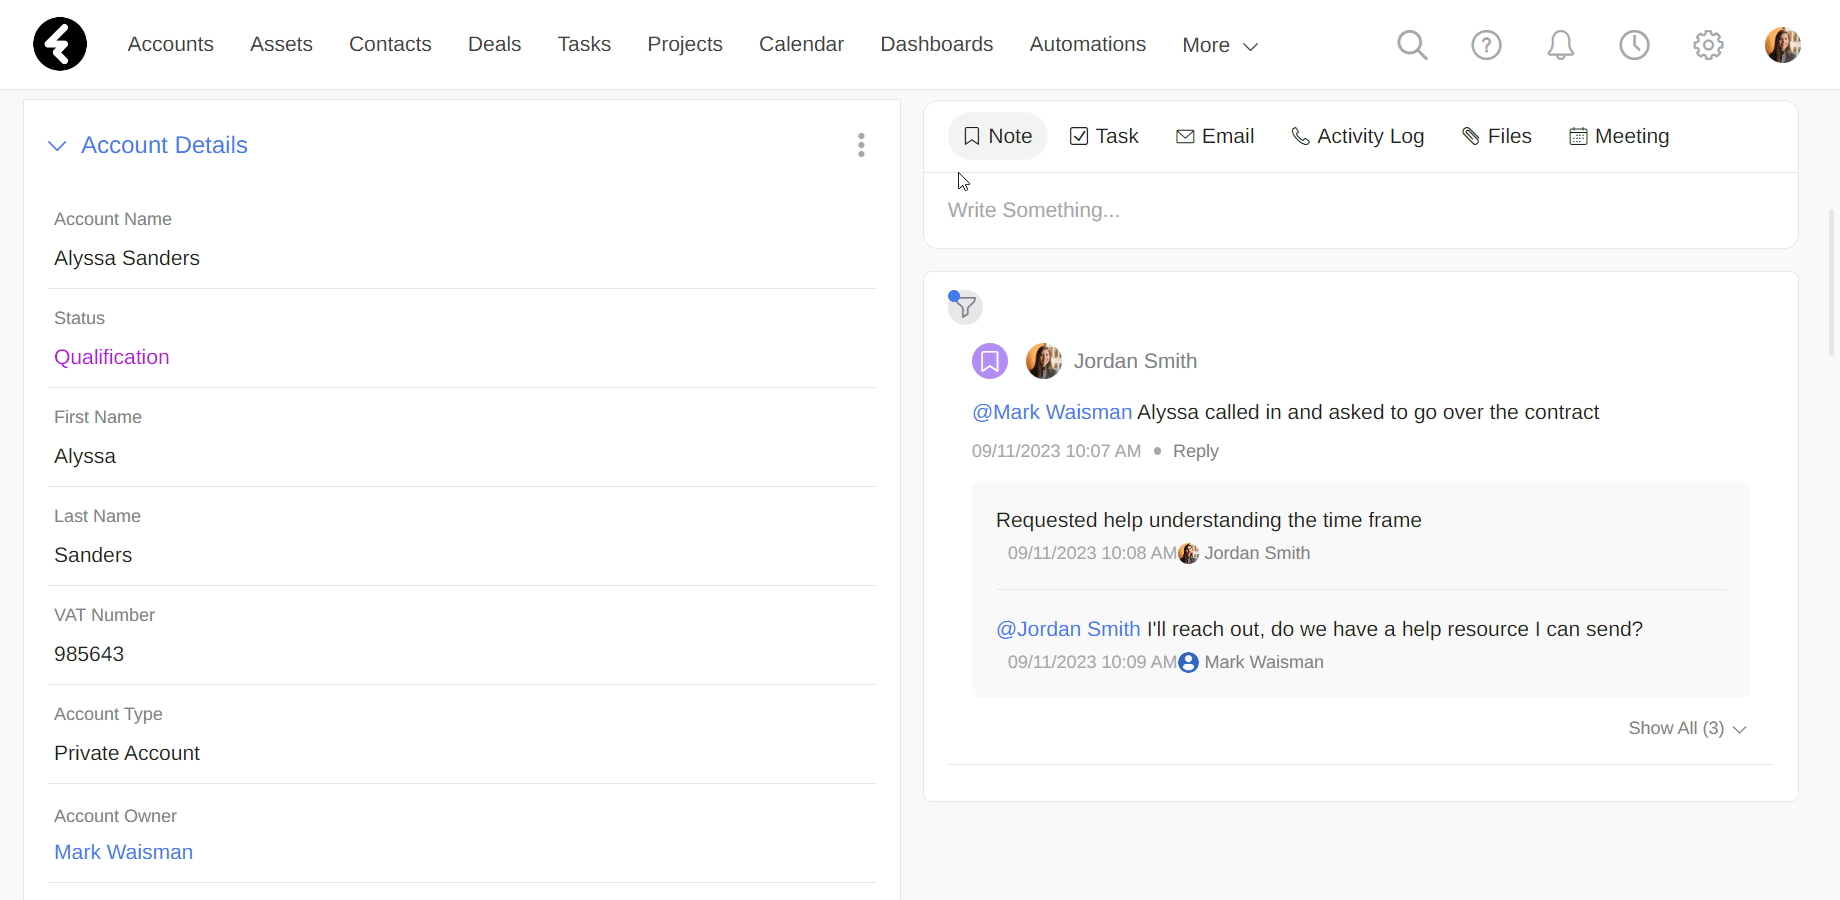
By using notes, you can manage your intra organizational communication and keep your team members updated about important details regarding any record. You can easily have back and forth conversations by mentioning other system users in a note or replying to existing notes. In this way, your team members can be alerted to any changes or updates they may need to know about. Each note is associated with a specific record.
Creating a note
To create a new note, simply choose the Note option from the top of the stream, write out your note, and click Update. To mention another system user in your note, type the “@” symbol. This will open a list of system users which you can choose from. Type after the @ to search for a specific user’s first or last name. By clicking on a user’s name, it will appear in blue after the @ symbol. If you decide you don’t want to tag this user, simply erase their name and the @ symbol. You will not be able to tag yourself. Once you save your note, the mentioned user will receive a notification that they have been mentioned in a note, and a link to view this note.
For example, if a customer calls in, you can add a note which tags the case manager of the account to let them know that the customer called and what the customer wanted.
Comments
Other users can reply to your notes and create an effective communication channel. You can also reply to your own notes with any updates you may have, or in order to mention another user. In this way you can easily discuss record specific issues on each record’s page and keep each record's documentation in one place. Click Reply to add a comment to a note. Type anything you’d like to add and then click enter to save the comment. Each comment will display the time the comment was added and the user who added it, in addition to the comment itself. Whenever you reply to another user’s note, the system will send this user a notification and link to the note.
Once a note has more than two comments, only the first two comments will be displayed. To view the rest of the comments, click the Show All option. The parenthesis beside this option display the total amount of comments attached to this note. To hide the comments, simply click Show Less.
Tasks
Tasks are a great way to remember to do specific things within a set timeframe. Any task which is created from a record will automatically be related to the record. For example, you can create a new task in a specific account to remind the account manager to reach out to this account.
Creating tasks
To start, select the Task option from the top of the stream and write the subject of your task. To set a due date for your task, click No date next to the clock icon, select either a built in or custom date, and then click Save. Non custom options, such as In 2 hours or Tomorrow at 10:00 will save on their own. The task will automatically be assigned to you, the task creator. However, by clicking on your name you’ll open a list of system users where you can search for and select any user to assign the task to them. The status of your task will automatically be set to Open. If you’d like to set more task details, such as a different status, description, and more, click the expand icon in the top right corner. Be sure to click Save once you’ve set all your task details. The task will then be saved in this record’s stream and in the calendar of the assigned system user.
Managing tasks
If a record has any open tasks, they’ll be displayed at the top of the stream under the Open Tasks heading. To complete a task, simply click the check box on its left. Once a task is marked completed, it will move to the proper place in the stream based on its due date. You can set it as incomplete at any time by clicking the green checked box. This will return the task back to the Open Tasks section. You can also click on the owner or due date of a task at any time to update them. By clicking on the task’s subject, you can open its page and edit more of its details.

Emails
By connecting a team inbox, you can both send and receive emails directly from any record’s stream. In this way, you can easily track and manage your email correspondence with an account in one place, regardless of which email or team member was last in touch.
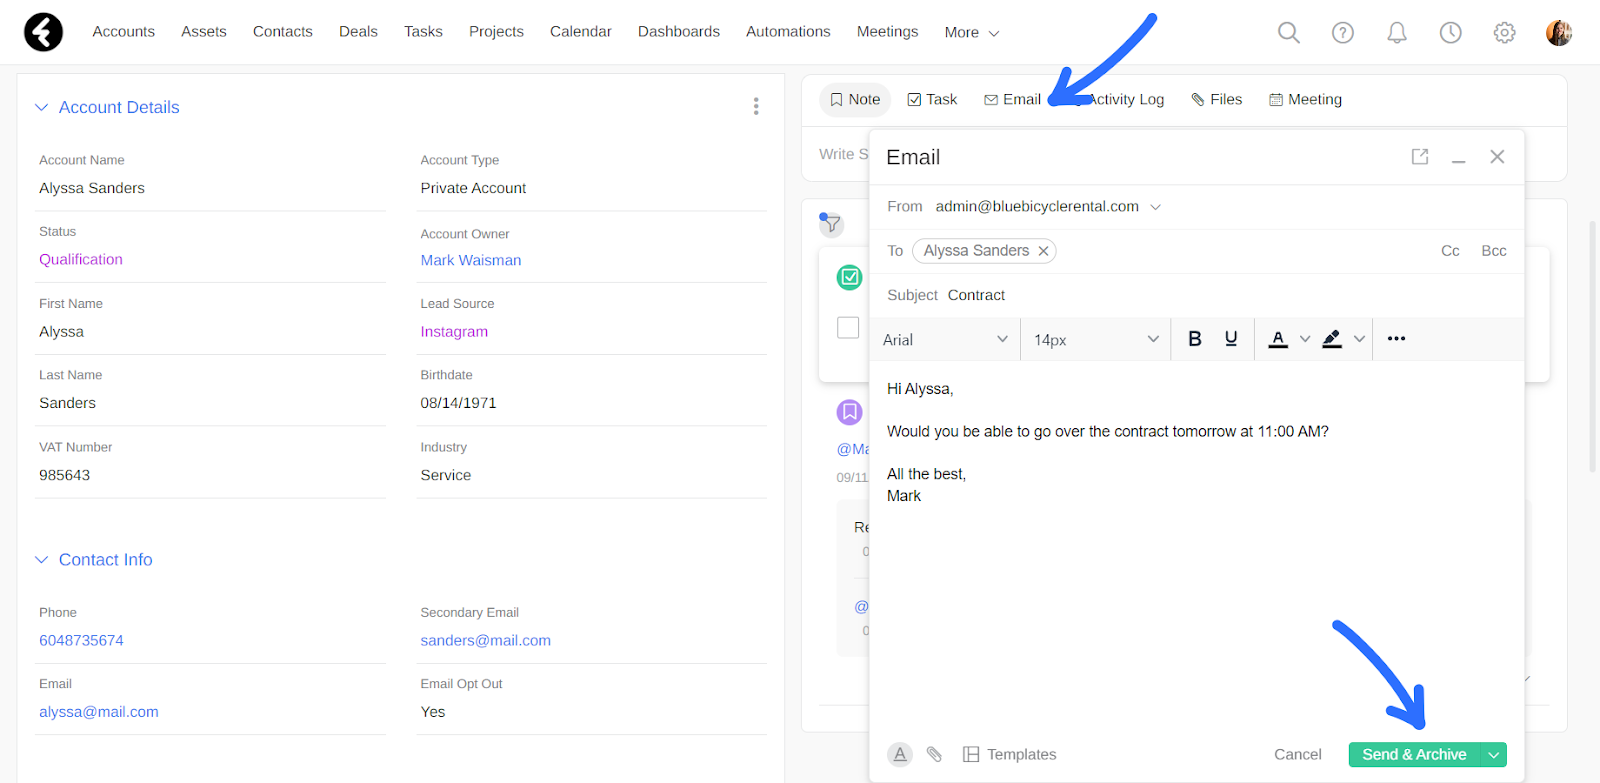
Sending emails
To start, select the Email option from the top of the stream to open an email dialog box. Note that the From field will automatically fill in with the email attached to your team inbox account and the To field will automatically fill in with the contact or account’s email address. Both can be changed at any time by clicking on them. Set the subject and content of your email. You can use the editor at the top of the email to customize it, such as setting a font, highlighting text, and more. For the full set of customization options, click the three dot menu. Next attach any relevant files using the paperclip icon, and then click Send & Archive.
Existing emails
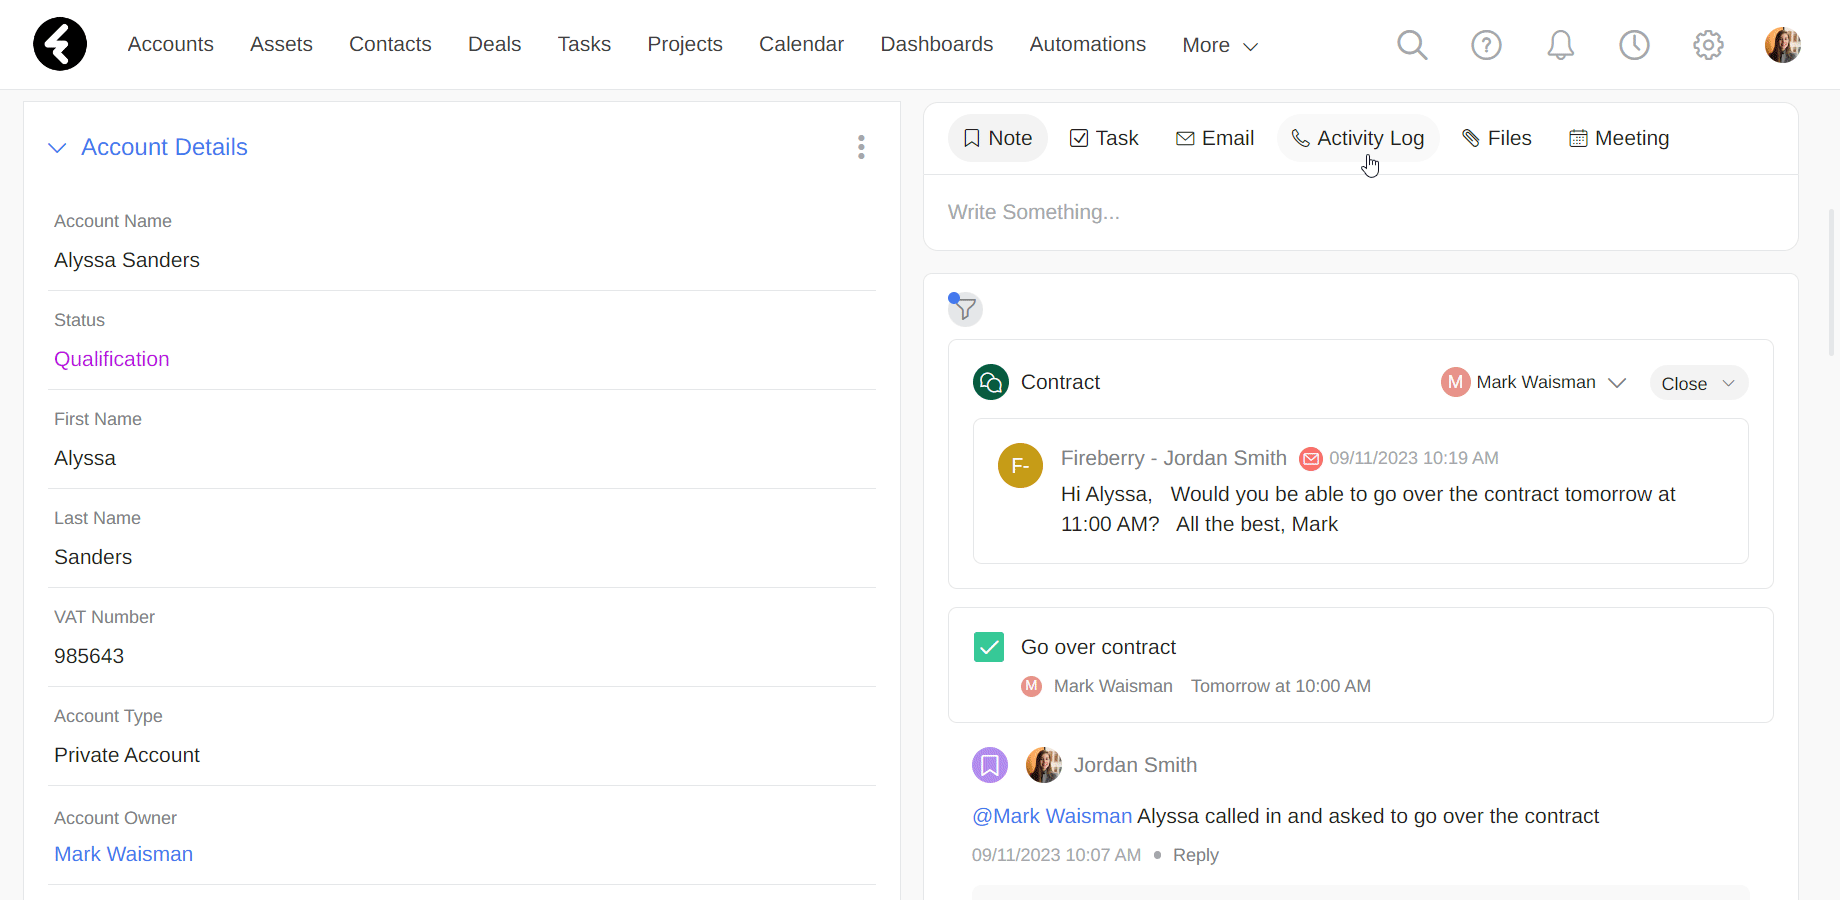
Once you send an email, it will be saved in the stream of the record the email was opened from. Incoming and synced emails may also appear in your stream, if the email address in the From field of the email matches any of the emails found in any of the email fields in an account or contact record.
Emails will be displayed in reverse chronological order, so that the most recent emails will appear first. Any emails with the Open status will be shown at the top of the list. Each email will be shown as a preview, and clicking on it will show the entire email, including the receiving email and the full text. You can click on the sender of the email to copy their email address. To return an email to preview mode, click on it again. The preview will show the sender of the email, followed by the time the email was sent.
Replies to emails will be attached as threads to the original email, and only the most recent email will be displayed in the email preview. To view all the emails in the thread, click the Show All button on the bottom right. It will be followed by parentheses with the total number of emails in the thread. Once all the emails are displayed, the text will change to Show Less, which you can click to return the email to the preview display.

Assigned user
At the top right of each email thread, you’ll find the name of a system user. You can use this field to assign the email to the system user in charge of it. This field will automatically fill in with the owner of the record attached to the email for any incoming emails. For example, if an incoming email is attached to an account, and Mark Waisman is the account owner, then the email will automatically be assigned to him. Outgoing emails will be automatically assigned to the user who sent the email. You can easily change the assigned user by clicking on the current user, and then searching for and selecting a new user.
Status
To the right of the assigned user you’ll find a bubble which either says Open or Closed. This is the status of an email, and will default to Open for incoming emails, Closed for outgoing emails which use the Send & Archive button, and Open for outgoing emails which use the Send option. Emails which are marked as Open will appear at the top of the stream. You can easily change the status of an email by clicking on its current status and selecting a new one. As soon as an email which is set to Open is replied to through the system, the email will be reset to Closed.

Activity logs
Activity logs are a great way to document conversations with customers. By tracking your correspondence, you’ll be able to manage customer relationships smoothly, regardless of the team member who was last in touch. Through using the type and result fields of an activity log, you’ll be able to easily analyze the ways and reasons why different types of customers reach out, and improve your communication model.
Create an activity log
To start, select the Activity Log option from the top of the stream. This will open a dialog box where you can set all the details. For example, you may wish to record a call you had with an account regarding their contract. After opening a new activity log, you can use the Type field to clarify the conversation was a Call. Next set the Result to the outcome of the call, in this case Open. Then set the Description to any important details you’d like to save, such as “Interested in resigning contract”. The Related To field will automatically fill in with the current record. You can set the Contact lookup field to the specific person you spoke to, and click Save to add your new call log. Now you and your team will know exactly what you last discussed with the account. If you’d like to create multiple activity logs in a row, click the arrow to the right of the Save button and click Save & New. This will both save the activity log to the stream and open a new blank activity log. Each activity log will also be saved to the activity log object.
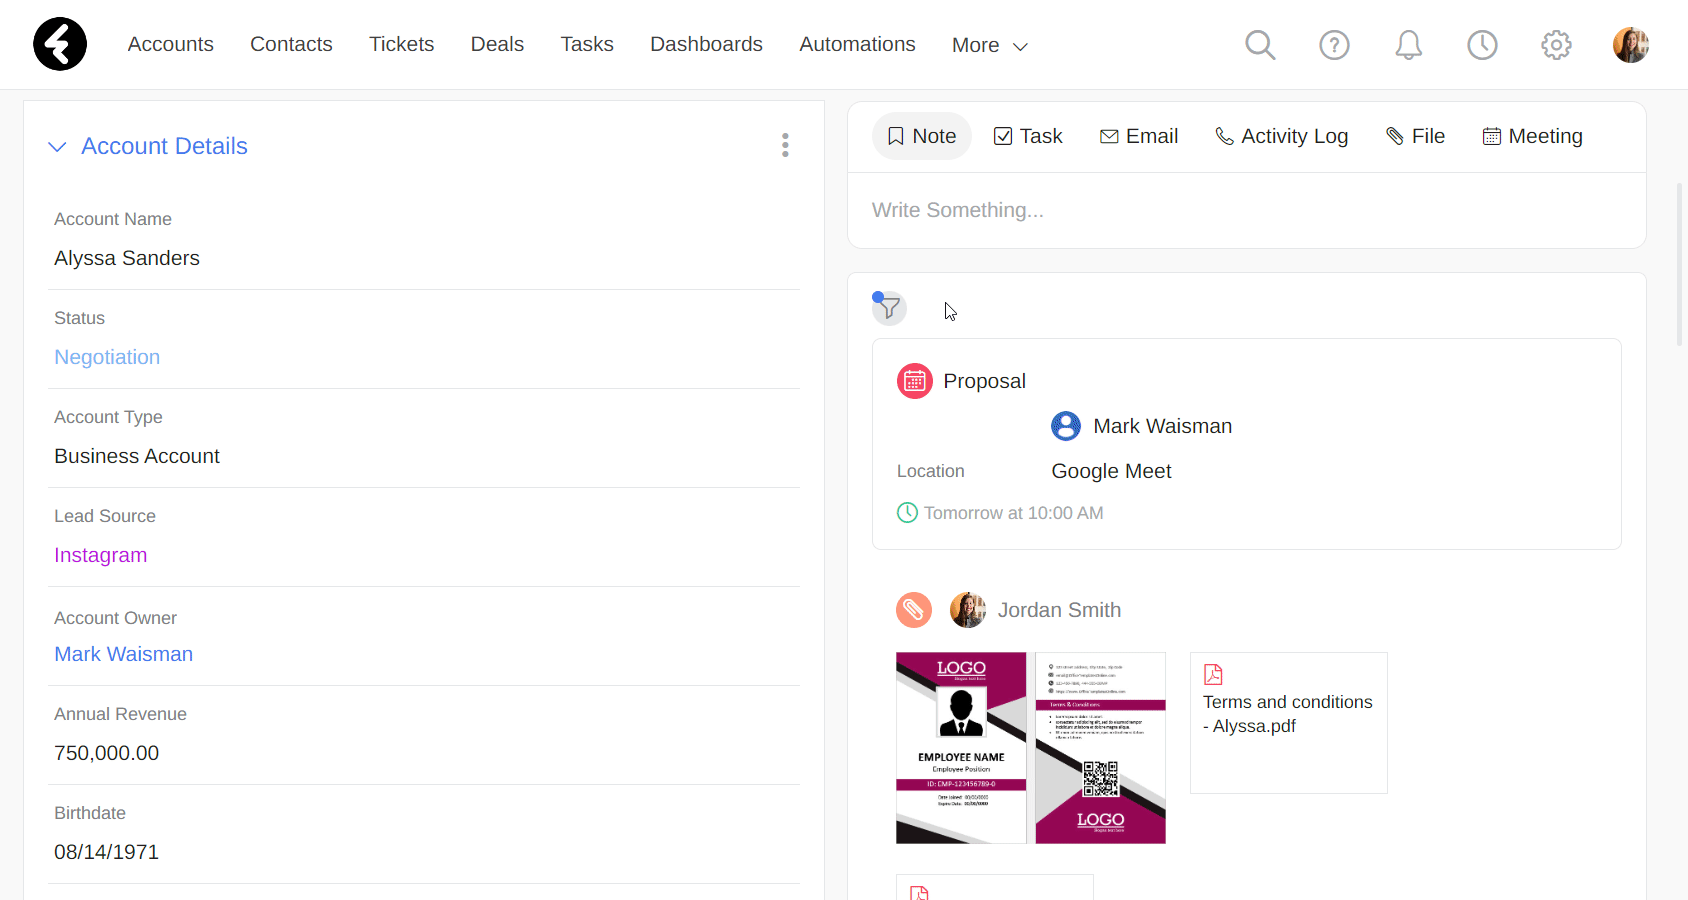
Files
You can upload any files or important documents to a record’s stream for safekeeping and easy sharing between system users. For example, you can upload a signed rental agreement to store it safely in the system and provide your team members with easy access to it.
Uploading files
To start, select Files from the top of the stream. You can then either drag files onto the page or click the blue browse button to select files from your computer’s file navigator. You can select multiple files with either option. You can also add more files after by dragging them in or clicking the green Add file button.
Files will appear as tabs with the name of the file followed by its size. While the file is uploading, a green progress bar will be displayed at the bottom of the tab. To remove any of the files, simply click the X on the right. You can also add a note to your files by clicking on the Write Something… text and writing whatever you’d like. Once you’ve finished, click the Update button to save the files to your stream.

Viewing files
Once a file is added to a record’s stream, you’ll see a thumbnail preview of the file. By hovering over it, you’ll display its name and be able to choose to delete it from the stream using the X in the top right corner, or download it using the download icon on the bottom right. By clicking on the file, you’ll open up a preview page where you can see the file. The name of the current file will be displayed at the top of this page, along with an option to download the file on the top right. You can close the preview page at any time using the X on the top left. By using the arrows on the left and right of the page, you’ll be able to preview any files which are attached to the current record.
You can also add comments to files just like notes, which are explained in detail above.
Meetings
By selecting the Meeting option from the top of the stream, you’ll open a dialog box where you’ll be able to create new meetings and see a calendar with the meetings related to the current user. In this way you can easily track a client’s meetings within your organization.
Meeting details
Under the Meeting Details section, you can set all the information for your new meeting. The Subject is a required field and will be displayed in the calendar immediately after the time of the meeting. By default, the Status field will be set to Scheduled. Once a meeting happens, you can switch the status to Took place, or, alternatively, you can set the status to canceled or rescheduled.

You can attach any meeting to a resource in order to reserve it, such as reserving a conference room for your meeting. To learn more about calendar resources, click here. Access to calendar resources depends on your license, which you can learn more about here.

The Related To field will automatically be filled in with the current record. The Start Date and End Date will be filled in automatically, and you can click on them to select new dates. While the Assigned to field will by default be set to the current user, you can easily change it by clicking the magnifying glass. This field, as well as the date fields, are required and must be filled in in order to save your new meeting. You can also choose to set the Type, Location, Priority, and Description of your meeting.
Meeting calendar
On the right side, you’ll be able to see all of the current user’s meetings. The meeting details you’ve chosen on the left will appear in an outlined box on the calendar. By clicking the expansion icon on the top right of the calendar, you’ll be able to open a bigger page where you can choose to display the calendar by Month, in addition to the Day and Week options. The time frame selected will be displayed on the top left, and you can navigate between different times by clicking the arrows on the left. In this way, you can easily choose an available time for your meeting.
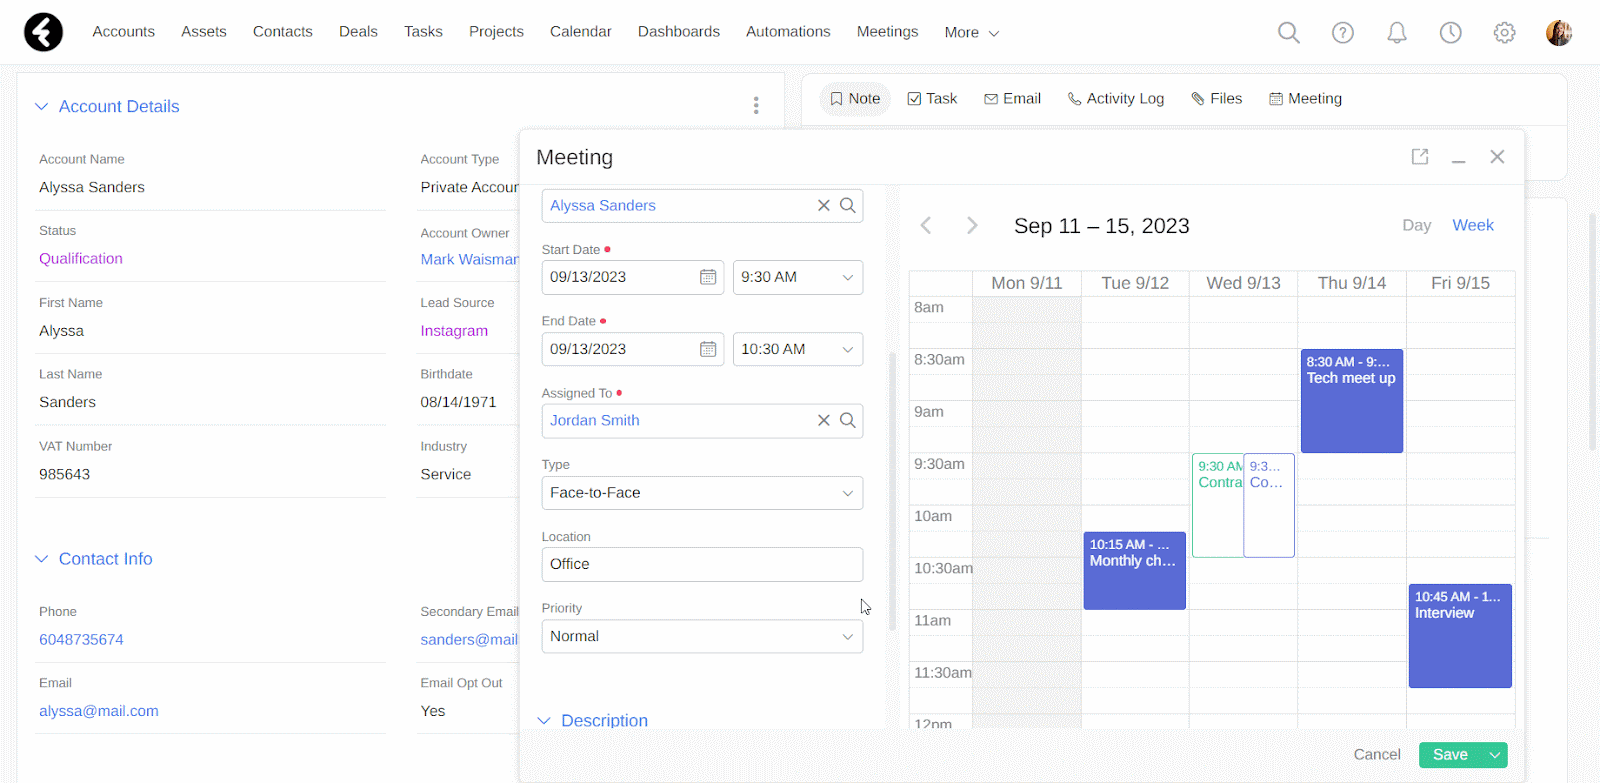
Once you’ve finished setting all your meeting details, click Save. This will save and sync the new meeting to the assigned user’s calendar, the record’s stream, and the meetings object.
Managing your stream
Each stream contains all the activities listed above in reverse chronological order, so that the most recent ones will appear at the top. The stream shows the 50 most recent activities which have been documented. If you’d like to see the rest of the activities, simply click the Load more option at the bottom of the stream.
Deleting stream activities
You can delete stream activities at any time by hovering over them and then clicking on the X on the top right. This will open a pop up where you can confirm you’d like to delete the activity by clicking the red button. By deleting an activity you’ll delete it both from the stream and from the entire system. For example, if you delete a meeting from a record’s stream, it will no longer exist in the meetings object or as part of your calendar. You will not be able to delete emails. You can delete individual comments instead of deleting an entire note. Deleting a comment will only delete the specific comment, while deleting a note will delete both the note and all of the comments attached to it.
Filter
The filter funnel icon can be found in the upper left corner of the stream. It determines which data will be displayed in the stream. By clicking on the filter, you’ll open a dialog box where you can choose which activities you’d like to view using the checkboxes. You can use the Select All option to display all the stream activities. For example, you can remove Activity Log from the stream by clicking the box next to its name and clicking Save. Now your stream will no longer display any activity logs.
The filter settings will be saved per object, so that saving a filter within an account record will change the stream display for all account records. It will not change the display of the contact records, deal records, or any other objects. You can update your stream filters at any time.
Now that you've learned how to manage your stream, you can easily organize and keep track of your record’s data.
Use all the different stream activities to interact with your record. Schedule meetings, send emails, write notes, upload files, and more.
Course Lessons
Up next
Congratulations, you finished this course!
Click below to start the next one
