View settings
In the last lesson you learned why views are useful and how to create a new view. Below you’ll learn how to work with your new view using its settings.
Duplicating views
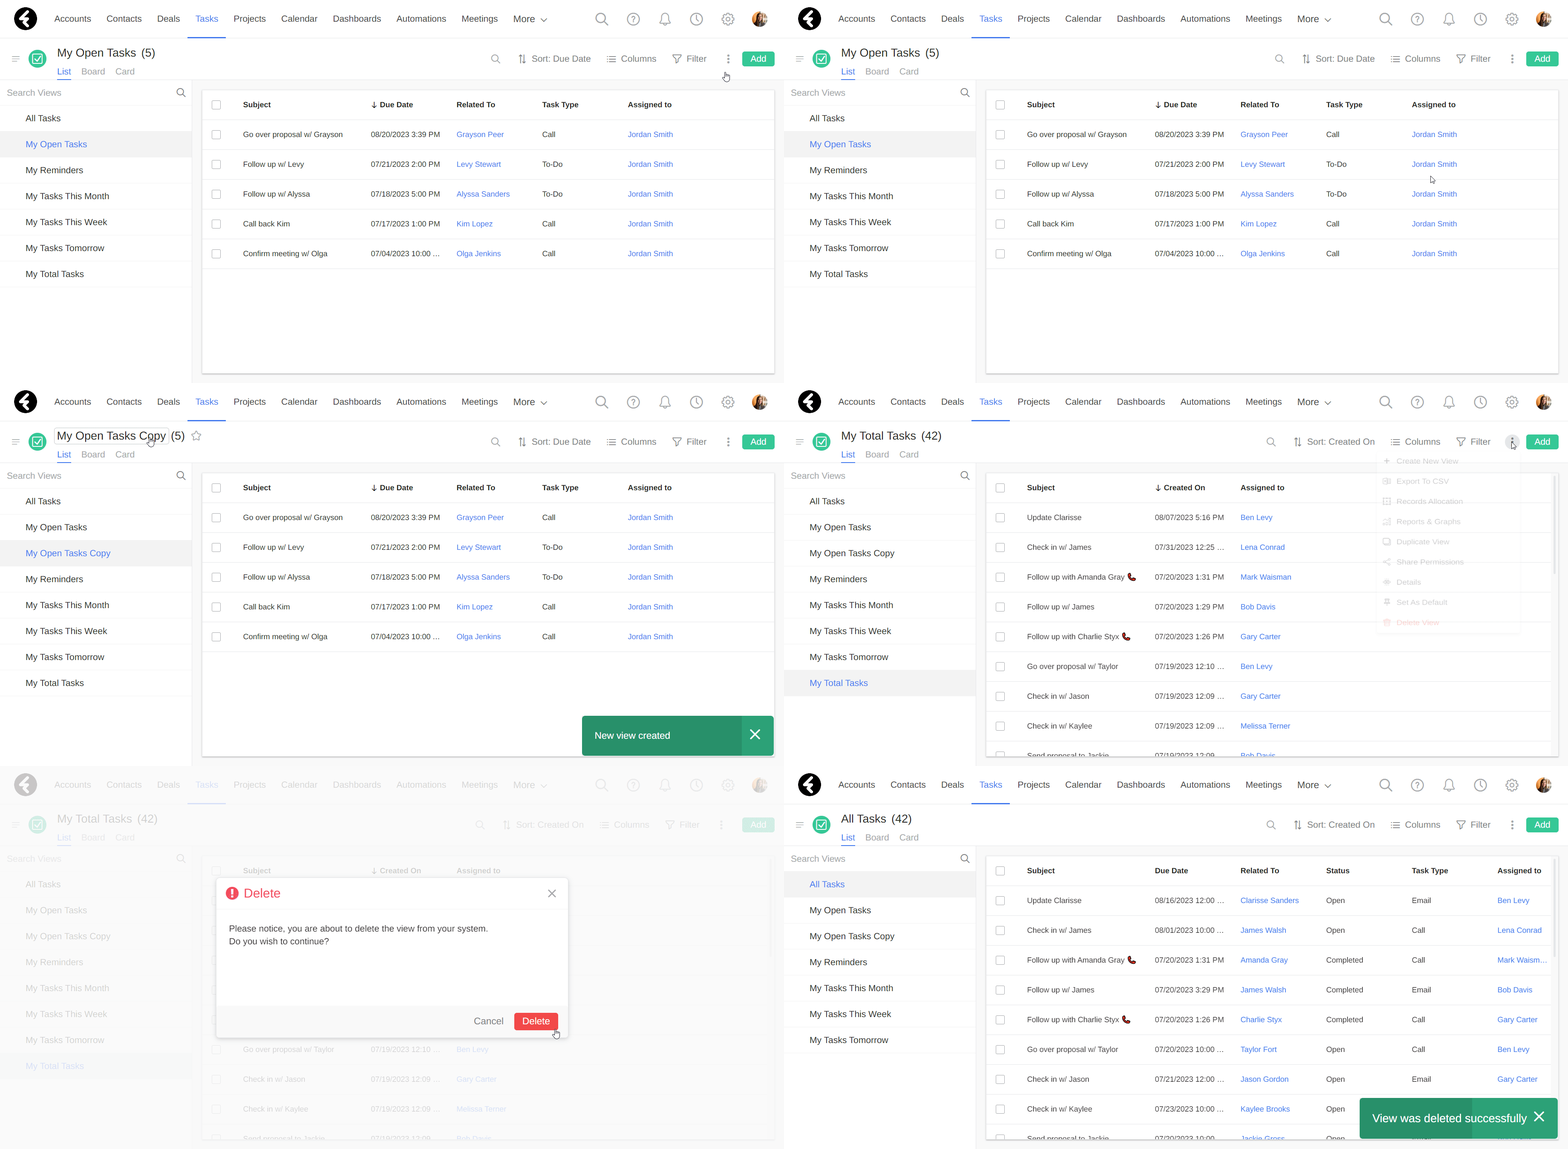
You may wish to create a view with settings which are very similar to an existing view. In this case, you can use the duplicate option to save time. Duplicating a view will duplicate all its current settings, including the columns, filters, share permissions, and more. You’ll learn about most of these options in the next lesson.
To duplicate a view simply open the view you’d like to duplicate, click the three dot menu on the top right, and select the Duplicate View option. This will create and open an identical copy of the current view, and will title the new view as the title of the original view followed by the word Copy. You can now change the name of this view, and customize it however you’d like.
Deleting views
If you’d like to delete a view, simply select the Delete View option from the three dot menu. This will open a pop up where you’ll need to click Delete to confirm you’d like to delete the view. By clicking it you’ll delete the view itself and all of its settings. The records which were displayed within the view will not be deleted or changed in any way. Note that you will not be able to delete the default view, which you’ll learn about later.
Share permissions
Each view has its own set of share permissions where you can choose which system users will be able to use it. Anyone who the view is shared with will be able to view, edit the settings of, and delete the view. By using the share permissions, you can keep your data safe and in the right hands.
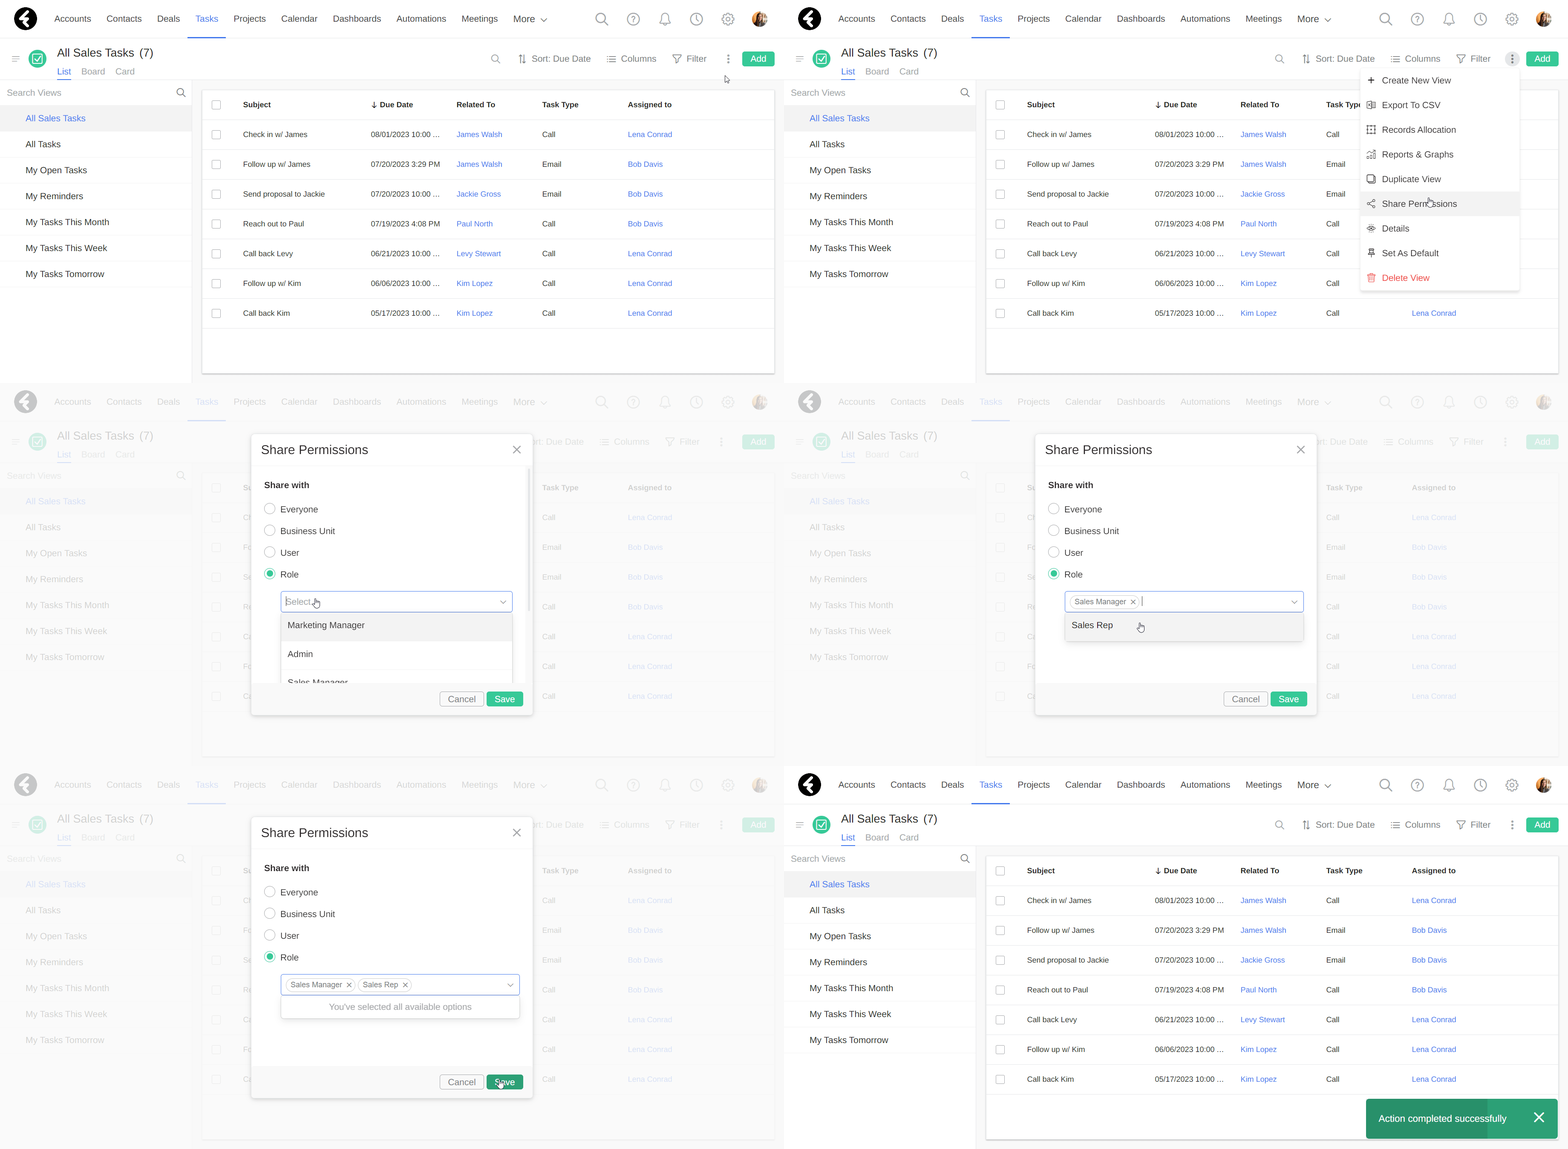
To set a view's permissions, click the three dot menu on the top right and then select the Share Permissions option. You will not be able to change the share permissions of the default view, which you’ll learn about soon, so the Share Permissions option will not exist in this view.
After opening the settings, you can choose to share your view with Everyone, which will share the view with all the users in your system. This is the default for all views. You can also choose to share the view with specific Business Units, Users, or Roles in the system. To do so simply click the dot next to one of these options and then search for and select any options you’d like to include. For example, you can select the Role option and share the current view only with users whose role is set to either Sales Rep or Sales Manager. Be sure to click Save once you’re finished setting the share permissions.
Details
If you’d like to check when a view was created or last modified and by who, you can do so at any time by clicking the Details option in the three dot menu. This allows you to check when the last edit was made and by who.

Reports & graphs
If you’d like to analyze information about a specific object or view, you can use the Reports & Graphs option found in the three dot menu. By clicking this option, you’ll open a page where you can create and view widgets which summarize the current object. Under the View chart by: heading on the left you’ll find a list of all the existing widgets, which you can click on to view. The widget you are currently viewing can be identified by the blue line and bolded title. Use the Add new chart button at the bottom to add new widgets to this list.
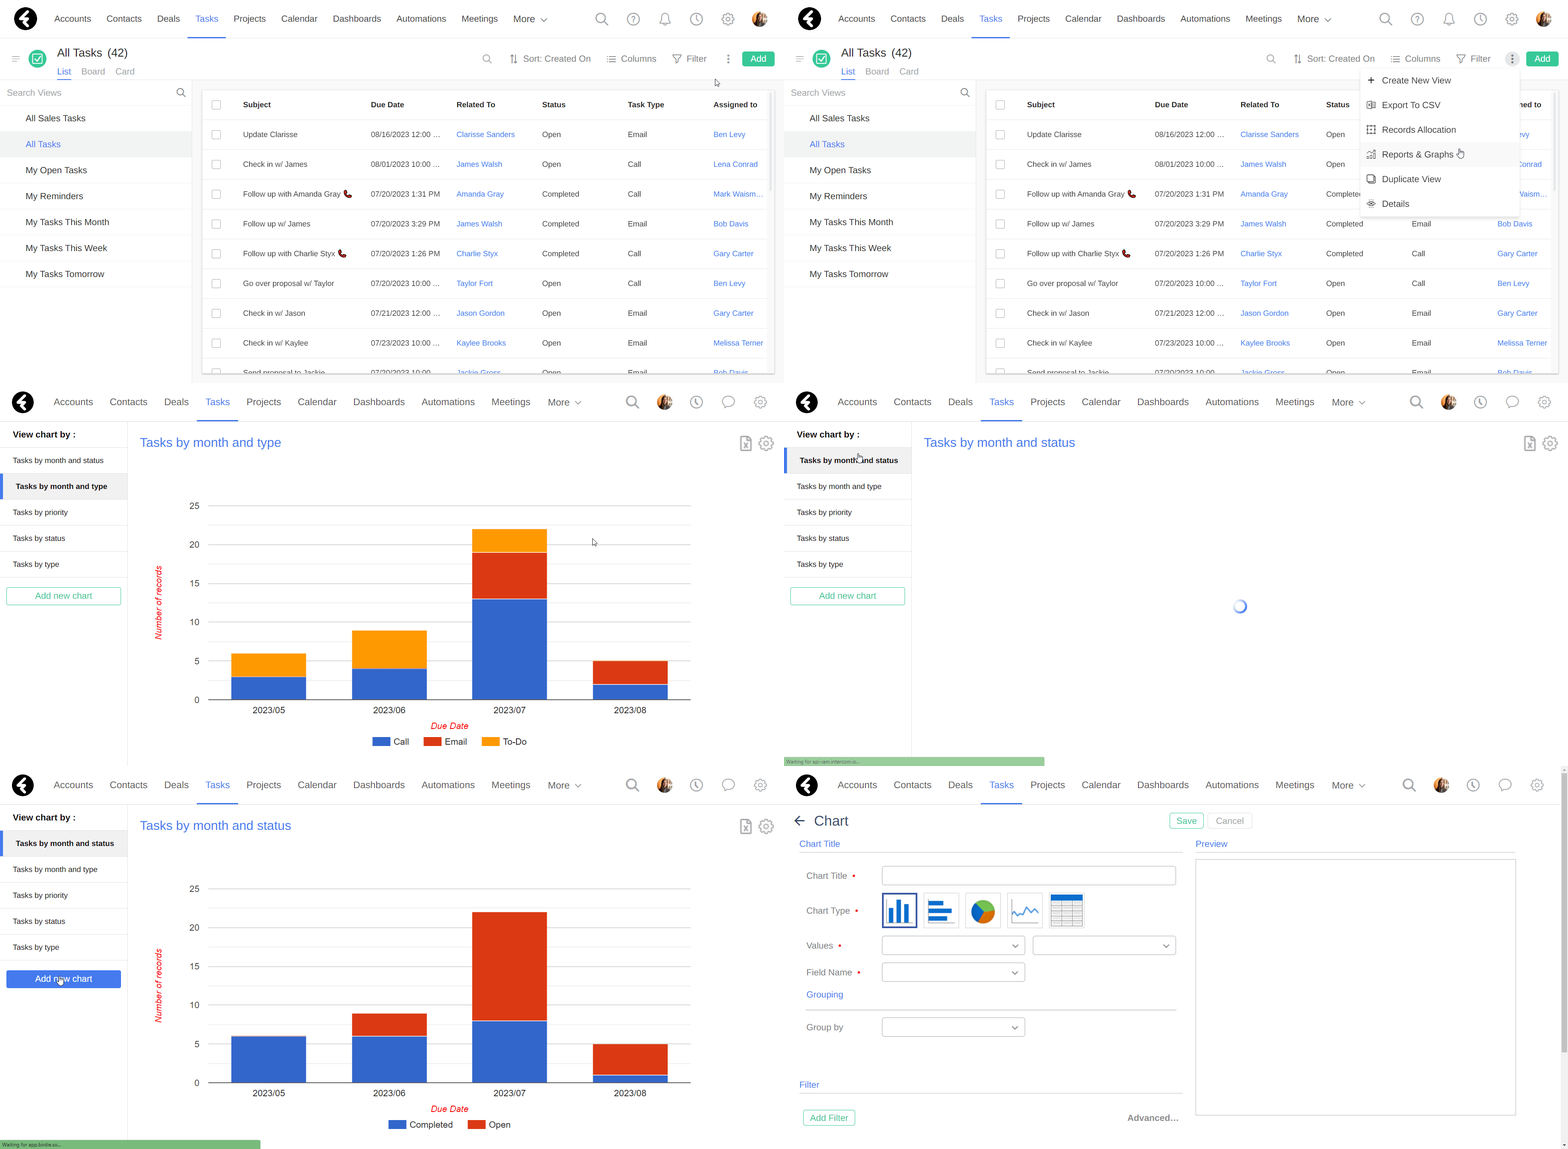
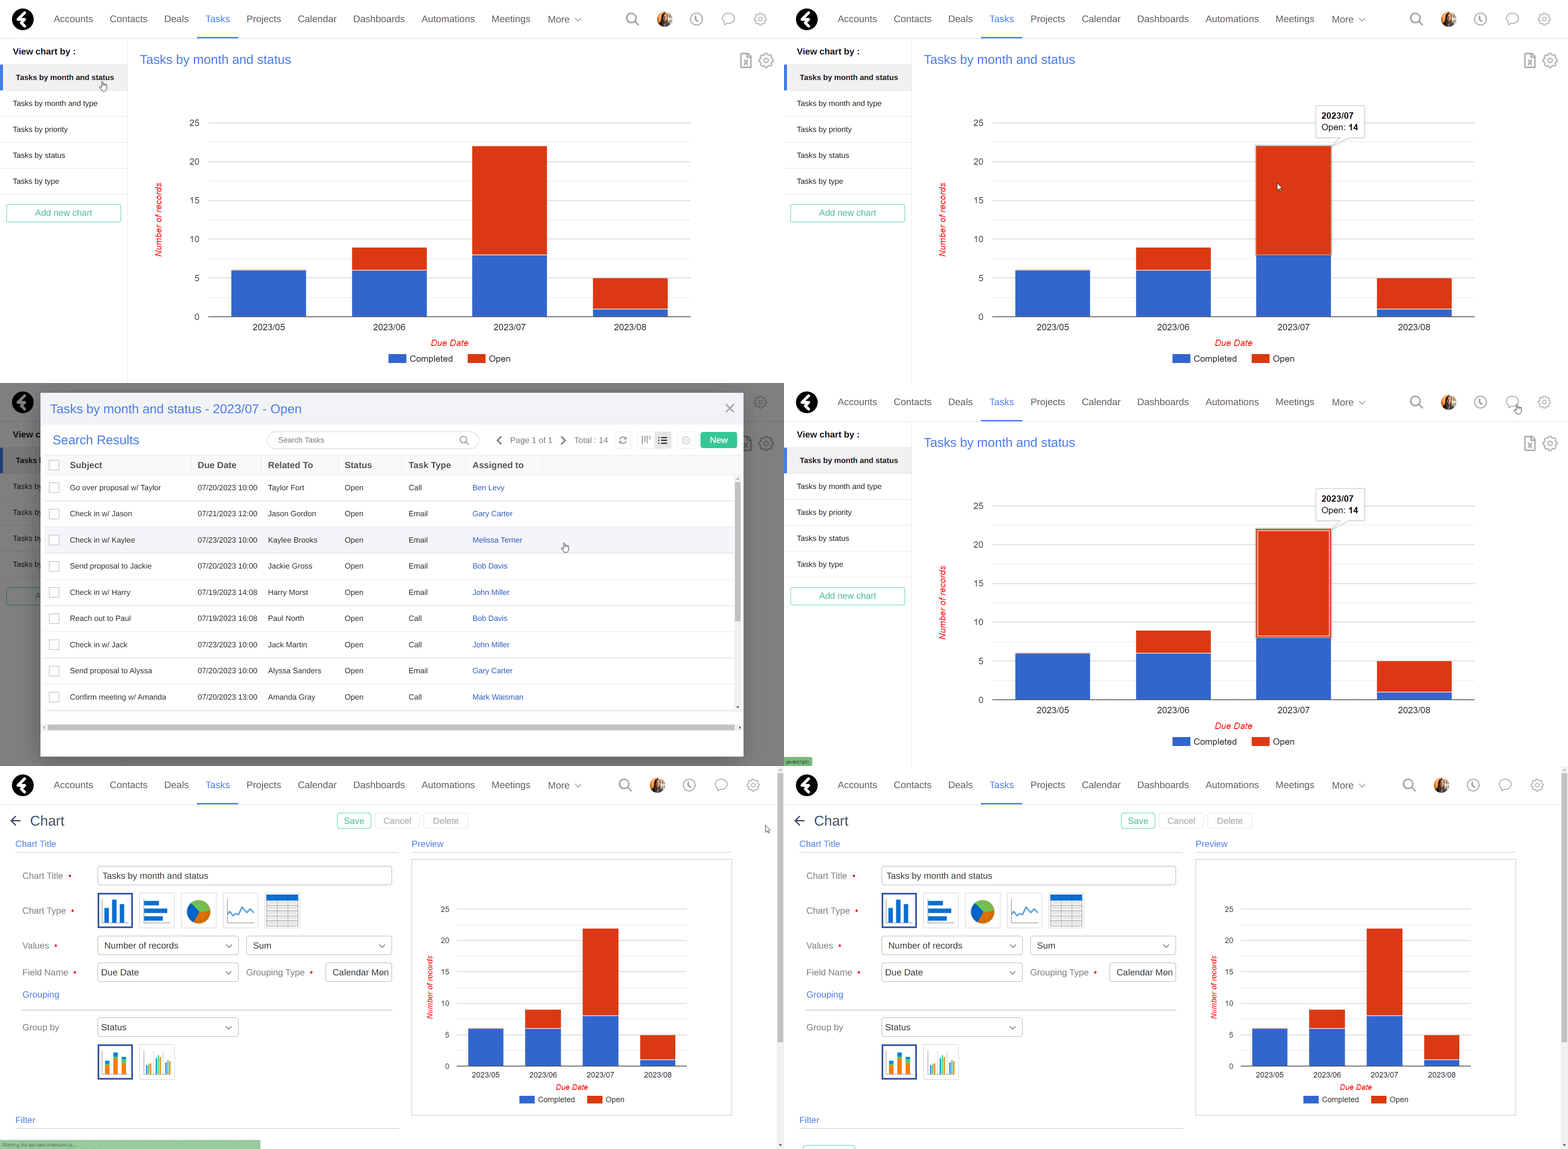
On the right you’ll find the widget you are viewing, such as the tasks bar graph Tasks by month and status. You can hover over a section in a chart to display its parameters. For example, hovering over the July open tasks section will display 2023/07 Open: 14.
By clicking on any of the sections in this chart, you’ll open a list of all the tasks which belong to the selected section. For example, by clicking the July open tasks section, you’ll open a list view of the 14 tasks which are open and have their due date set to July.
Export to CSV
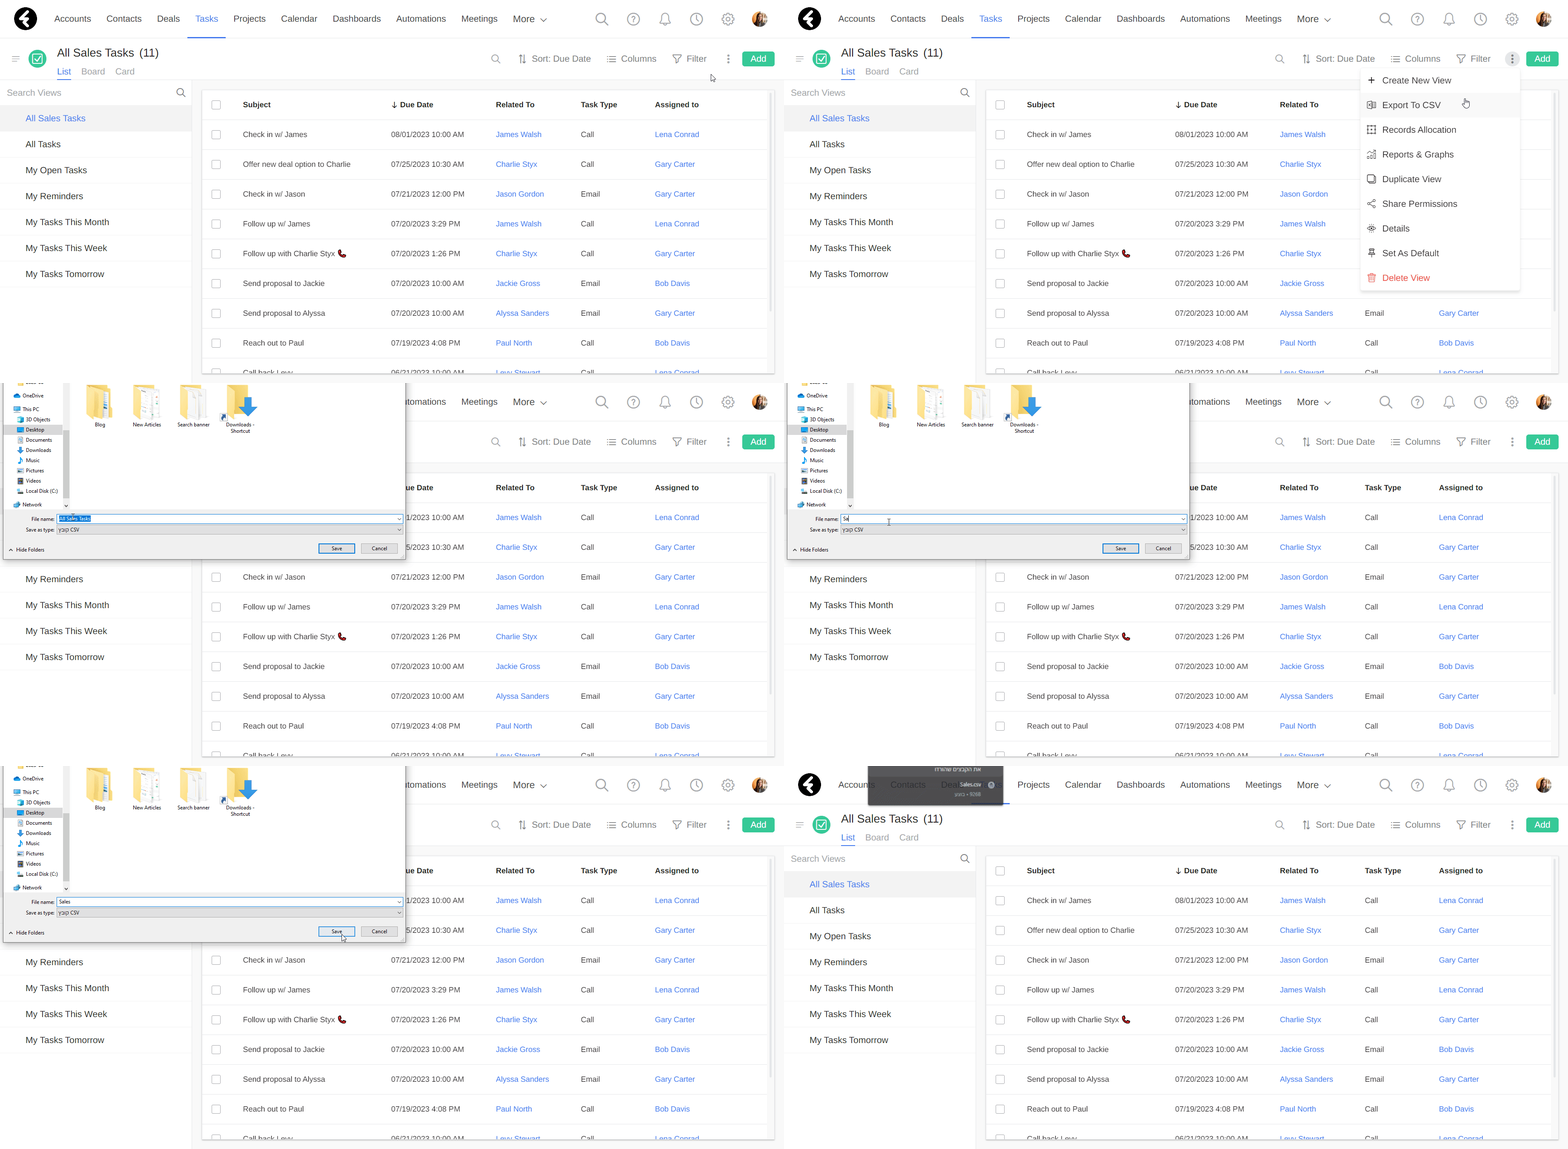
Any view can be individually exported to a CSV. Before exporting it, make sure all the fields you would like to export are set as columns in the view. You can include up to twenty columns. The sort settings you are currently using will also be exported to your CSV file. To export a view, simply click the Export to CSV option from the three dot menu. This will open your computer files, where you can choose where you’d like to export your file to. The name of the file will be set to the name of the view, but you can rename the file on your computer files before saving it. Click save to download your exported view to the selected location.
You may have noticed the Set as Default option in some of the view settings. This option sets one specific view as the default view for an object, and will be explained in depth later.
Now that you’ve learned about the different view settings, you can continue to the next lesson where you’ll learn how to customize your view.
Learn about the different view settings to fully manage your views. Use duplicate to quickly create similar views, delete irrelevant views, control user access to views, and export your data with a click.
Course Lessons
Up next
