Page settings
Now that you’ve learned how to add and edit forms and fields, let's get back to our general pages. You’ll frequently find multiple different pages for a single object. Each page will be designated for specific user roles. In this way each of your users can have a customized system where the content displayed on their pages is relevant to them. In addition, this ensures that you only display data for each user which they are supposed to have access to, so that all your information stays in the right hands.
For example, the sales team’s page for the accounts object includes fields and components which are relevant to them making a sale, such as sale call scripts and contracts. The customer service team’s accounts page does not include access to contracts, but does include details about the account’s tickets. You can even use a management page, which provides full access on a high level so as not to be overwhelmed by inconsequential details.
Opening the page editor
Later on we’ll go over how to manage multiple pages. For now, let’s take a look at how to edit existing pages. To start, open the page you’d like to edit. First select the object which uses the page you’d like to edit from the top-bar menu, such as Deals. Next open a random record and then click the three dot menu and select Edit Page. You’ve now opened the relevant page editor. At the top of the page you’ll see the name of the page, such as Deals- Sales .
Renaming pages
You can now change the name of the page by clicking on it. This will open the editor. Simply type in a new name and click enter to save it. In this way you can make sure all your pages use a relevant name.

Page displays
While structuring your pages, you may wish to check how your page will be displayed on mobile. By clicking the mobile icon on the top right, you’ll switch the display to mobile. If you’d like to switch back to the desktop view, simply click the desktop icon.
Duplicating and deleting pages
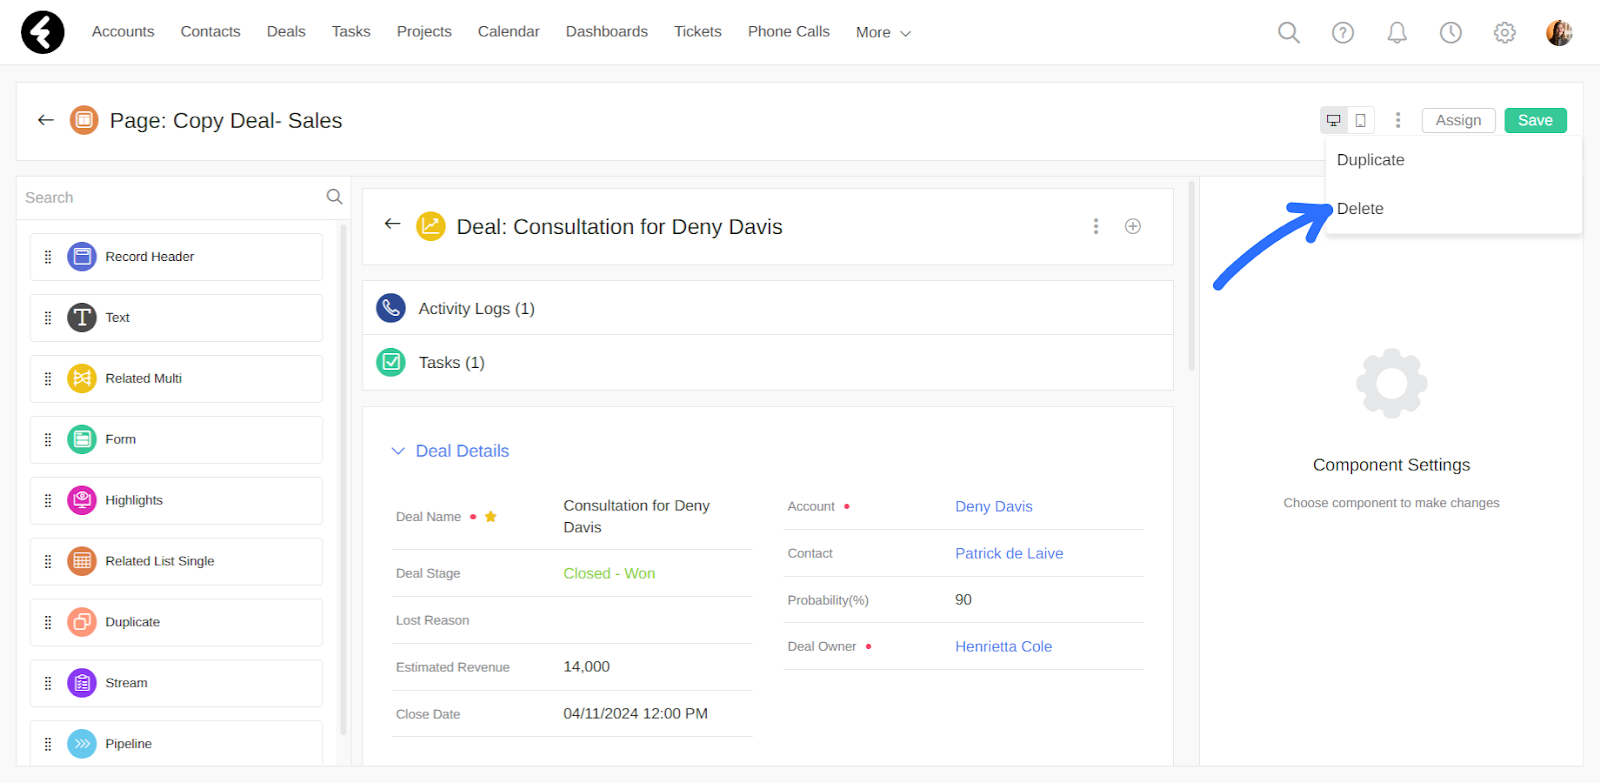
Sometimes you may wish to create a page which is quite similar to an existing page. For example, you may want to take the sales page above and create a page for sales managers. This new page will include many similar components to the ones which already exist. Instead of having to build everything from scratch, you can click the three dot menu at the top of the page and select the Duplicate option. This will create an exact copy of the page you’re currently open to, and open the newly made copy. The name of your duplicated page will be the name of the original page preceded by the word “Copy”.

If you decide that you no longer need a page, you can easily delete it by opening the three dot menu and selecting delete. By typing DELETE into the popup and clicking Delete, you’ll successfully delete the page you’re open to. You won’t be able to delete default pages, which you’ll learn about in the next course. For this reason, you won’t always see the delete option.
Assigning pages
An important part of using multiple pages is assigning pages to the relevant roles. For example, you’ll want the customer service team’s page to be assigned to the Customer Service Rep and Customer Service Manager roles. In this way, any users who are assigned either of these roles will view the selected page. In a later course you’ll learn all about users and roles.
To set which roles a page is assigned to, simply click the Assign button on the top right. This will open a pop up where the left will show a list of all the roles in your system, and the right will show a list of the roles which are assigned to this page. To add a role to the assigned section, simply click on it. To remove a role, click the X on its right. Be sure to click Save once you’re done to save your changes. You can also click Cancel at any time to undo changes you’ve made.

Using the methods above, you can edit your existing pages. In the next course you’ll learn how to customize your page components and how to manage multiple pages.
Use the different page options to rename, duplicate, or delete pages. Assign pages to system roles to set who will use each page.
Course Lessons
Up next
Congratulations, you finished this course!
Click below to start the next one